


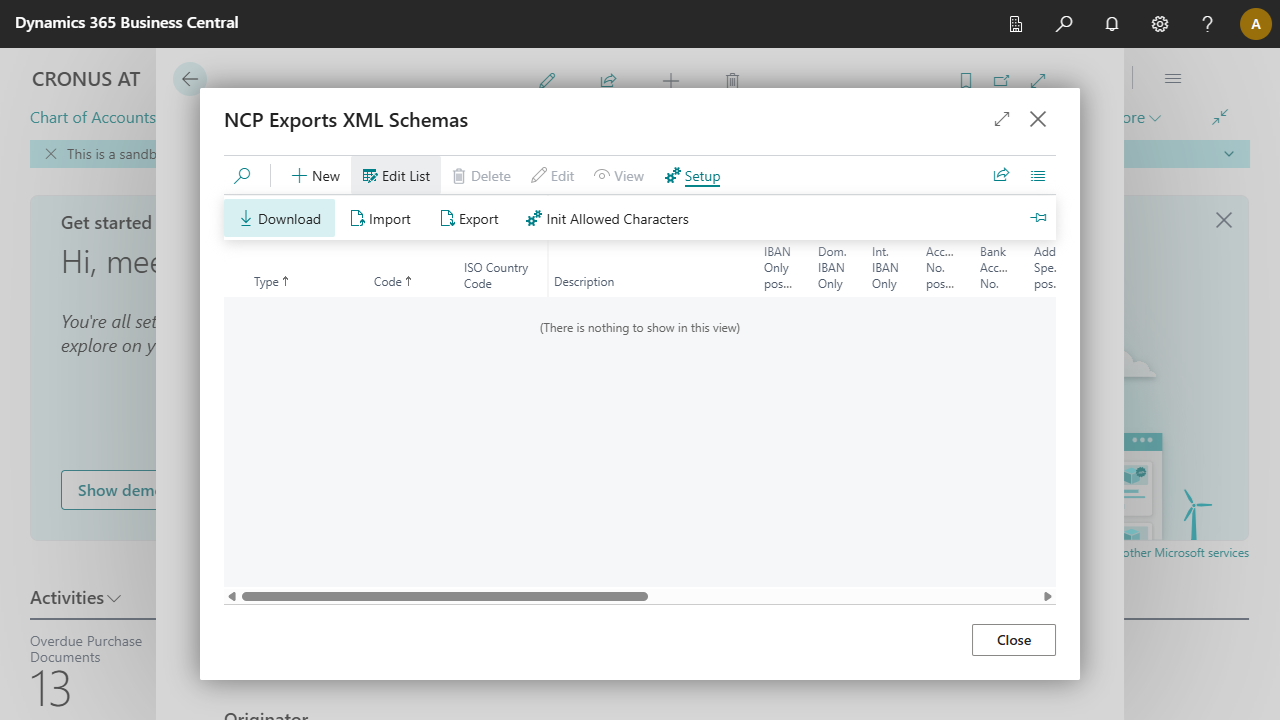


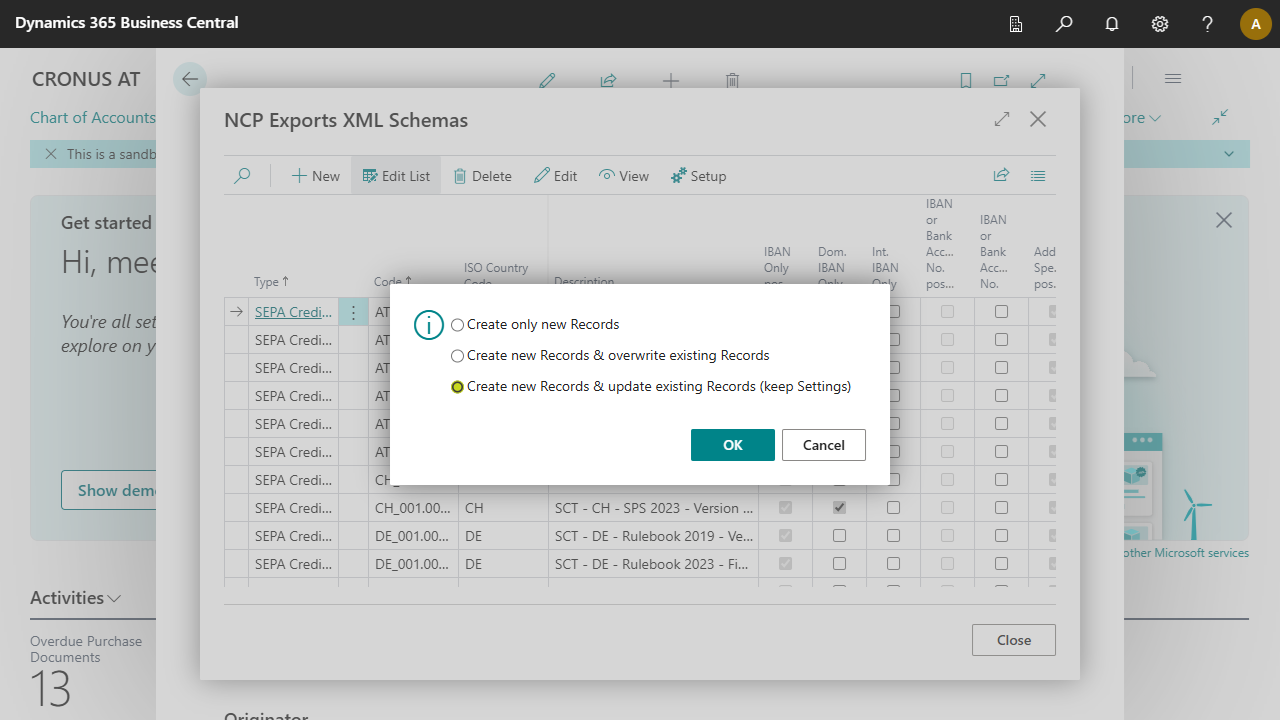
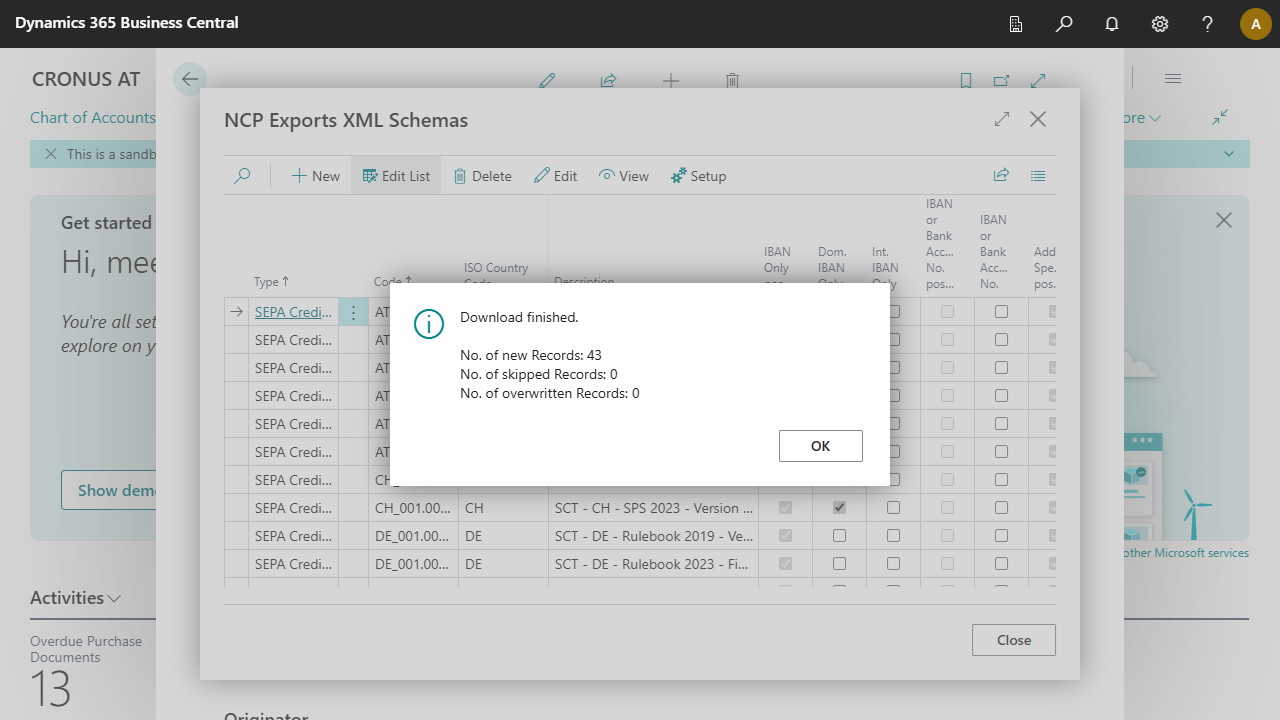
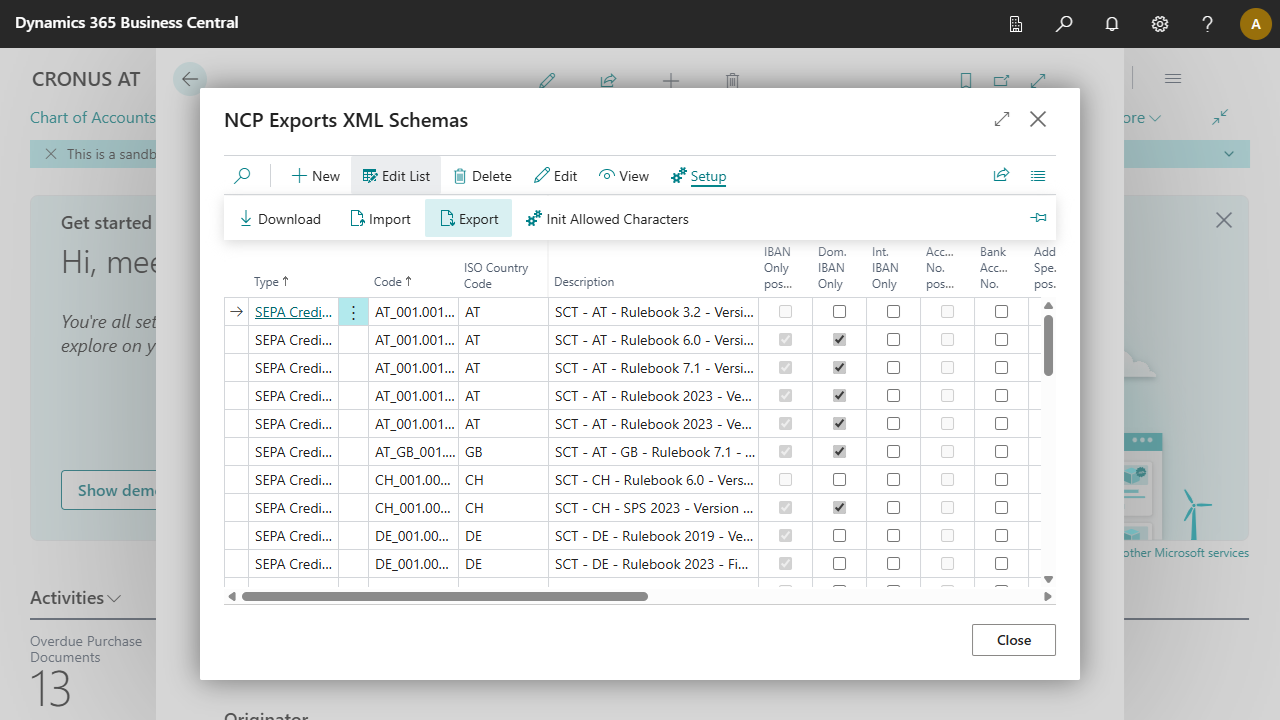


| Type | Specifies the type of XML schema. Possible values are: SEPA Credit Transfer, SEPA Direct Debit and Non-SEPA Credit Transfer |
| Code | Specifies the code of the XML schema. This code meets the SEPA standard of the schema. You can find more information on this on Payment Transactions |
| ISO Country Code | Specifies the countries for which the schema is valid. Some countries have different requirements of the ISO standard. |
| Description | The field Description is a combination of the abbreviation of the field Type, the ISO country code and the rulebook version of the schema. This only applies to downloaded schemas. If you have created a schema yourself, the Description is assigned by you. |
| IBAN Only possible | The field IBAN Only possible indicates that the schema also supports transactions without the specification of SWIFT Code. |
| Dom. IBAN Only | The field IBAN Only possible indicates that the schema also supports transactions without the specification of SWIFT Code. If Dom. IBAN Only is set, domestic transactions are also allowed without SWIFT Code. |
| Int. IBAN Only | The field IBAN Only possible indicates that the schema also supports transactions without the specification of SWIFT Code. If Int. IBAN Only is set, foreign transactions are also allowed without SWIFT Code. |
| IBAN or Bank Account No. possible | The field IBAN or Bank Account No. possible indicates that the schema also supports transactions without IBAN. |
| IBAN or Bank Account No. | The field IBAN or Bank Account No. possible indicates that the schema also supports transactions without IBAN. If IBAN or account number is set, the account number of the recipient bank is written to the payment file if no IBAN exists. |
| Address Specification possible | Indicates that the schema supports address information. |
| Originator Address | The field Address Specification possible views whether the scheme supports address data. The field Originator Address specifies whether the address data of the originator, which was stored in the NCP Exports Setup, should be written to the payment file. |
| Recipient Address | The field Address Specification possible indicates that the scheme supports address data. The field Recipient Address specifies the address data of the recipient that should be written to the payment file. |
| Batch Booking | The field Batch Booking determines how the transactions are booked by the bank.
By default, this field remains empty, and the indicator (
|
| Extended Character Set | Specifies whether the extended character set will be enabled.
In general, the following characters are allowed:
abcdefghijklmnopqrstuvwxyz
ABCDEFGHIJKLMNOPQRSTUVWXYZ
0123456789
/-?:()., "space".
Until now, the following additional characters were allowed for Austrian bank accounts:
&;
In addition, the following characters were automatically converted:
< became "&lgt;"
> became ">"
& became "&"
" became """
became "'"
If the field is set, the above conversion is performed in this schema.
If the Extended Character Set field is not set, the & character is automatically converted to +, all other characters are replaced by a space.
all other characters are replaced by a space.
You can configure the character set by means of the action Allowed Character Set.
For more information, see SEPA Requirements for an Extended Character Set (UNICODE Subset) - Best Practices |
| Umlaut Conversion | Specifies whether to use umlaut conversion when creating a payment file. Some banking institutions do not allow the use of umlauts.
The conversion will:
|
| Charges Selection possible | Indicates that the schema allows the specification of charges. |
| Urgent Payment possible | Indicates that the schema supports urgent payments. For more information, see Tasks, Exports, Fast Payments: Urgent & Instant Transfer. |
| Instant Payment possible | Indicates that the schema supports instant payments. For more information, see Tasks, Exports, Fast Payments: Urgent & Instant Transfer. |
| Date of Specification | Specifies the date of the specification. |
| Last Date Modified (Schema Lines) | Shows whether, and if so, when the schema lines were last changed. |
| In Use | Indicates that the scheme is in use. |
| Use UTC Timezone | Specifies that the timestamp format should be in UTC timezone.
This means that the time information in the payment file is always specified in Coordinated Universal Time (UTC), regardless of the system or bank's timezone. This can be particularly important for international transactions to avoid misunderstandings or errors due to timezone differences. When this option is enabled, the time is automatically converted to UTC and formatted accordingly before being written to the XML file.
|
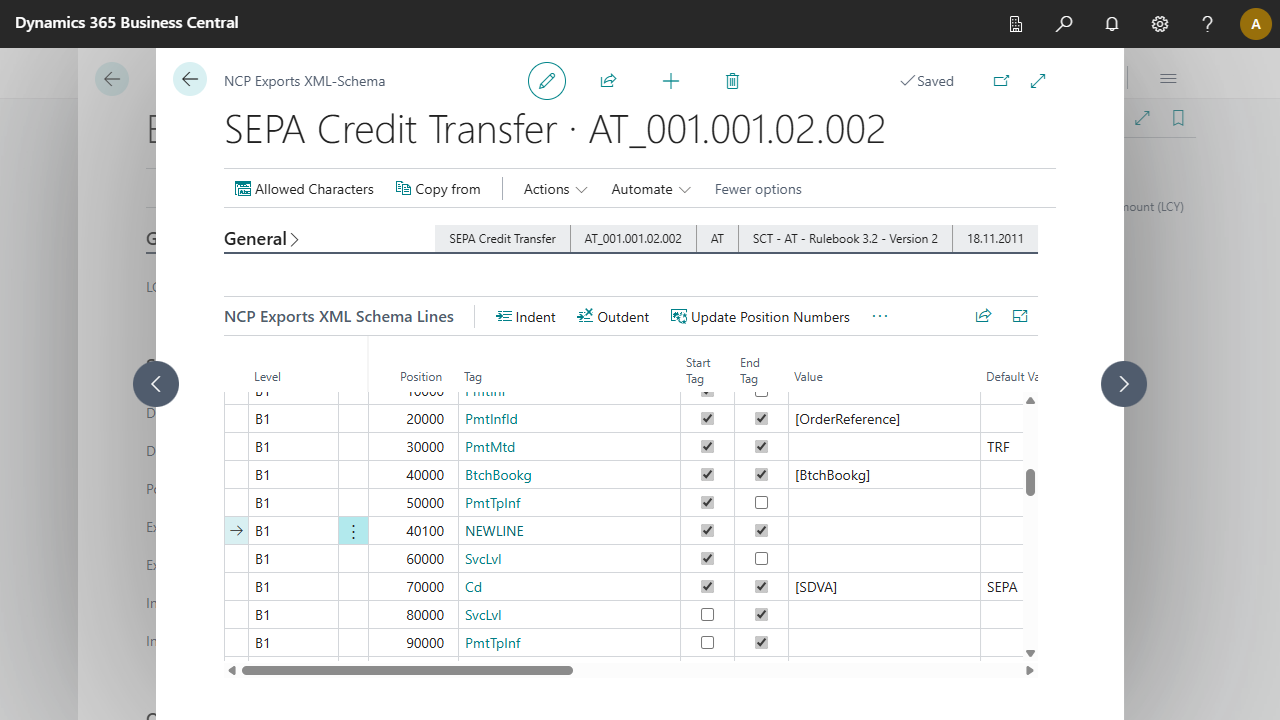
| Level | Specifies the level. The level can be understood as the parent XML nodes (e.g., GrpHdr, PmtInf..), within the level the position numbers are assigned per child XML node.
Available options:
|
| Position | Specifies the position of the line in the schema. Use the action Update Positions to re-sort the position numbers per Level, this is necessary after inserting a new line. |
| Indentation | Specifies the indentation, which hierarchically arranges the child XML nodes. The field is not visible on the page, use the actions Indent or Outdent to indent or outdent the XML nodes. |
| Tag | Specifies the tag name or node name for the XML node.
|
| Start Tag | Specifies that the node should be a start tag. By enabling this field, you can indicate that it is an XML node that should contain a start tag. If you activate the field, but not the End Tag field, a parent node is created (e.g., <Tag>). If both fields are activated, a child node is created (thus the XML node is closed in the same line, e.g., <tag>Value</tag>). |
| End Tag | Specifies that the node should be an end tag. By enabling this field, you can indicate that it is an XML node that should contain an end tag. If you activate the field, but not the Start Tag field, a parent node is created (e.g., <Tag>). If both fields are activated, a child node is created (thus the XML node is closed in the same line, e.g., <tag>Value</tag>). |
| Value | Specifies the value to be used as the inner text in this XML node. Using the AssitEdit function opens the NCP Exports XML Schema Values page, which provides you with some standard values to choose from, but you can also enter a custom value in the field. For more information, see Setup, XML Schema Values. |
| Default Value | Specifies the default value, a default value is understood as a constant. For example, in a SEPA domestic transfer in Austria, the <PmtMtd> node always needs to have the value TRF. For more information, see Setup, XML Schema Values. |
| Maximum Character Count | Specifies the maximum number of characters valid for the value of the XML node. |
| XML | Displays the XML of the tag. This column helps you understand the structure of the XML file. |
| Attribute | Specifies that the XML node contains an attribute. Enter the attribute name and value in quotation marks. |
| Skip | Specifies that the XML node should be skipped when a condition is met. The values Yes, If - OR, and If - AND are available. The Skip - If empty and Skip - If not empty fields define the values for the condition. |
| Skip - If empty | Specifies the value used for the condition to skip. So if the set value for the XML node is empty, it will be skipped. |
| Skip - If not empty | Specifies the value used for the condition to skip. So if the set value for the XML node is not empty, it will be skipped. |
| E-Document - ebInterface Create and send e-invoices in accordance with the Austrian standard. More information  |


