This chapter describes the import functionality for bank statements in Business Central. This import functionality is integrated into the modules NAVAX Payment Imports and NAVAX konfipay Connector Import. Typically, bank statements are exported from banking software in a standard format and then manually imported into Business Central.
The NAVAX konfipay Connector Import extension can assist you in automating this manual step and preventing errors by importing bank statements directly into Business Central via the konfipay Online Payment Services.
NAVAX Payment Transactions Imports supports the following formats:
camt.52
camt.53
camt.54
MT940
Custom
Step-by-Step Instructions: Importing a Bank Statement File
This section describes how to import a bank statement file.
Make Basic Settings
Ensure that the basic settings in the NCP Imports Setup have been configured.
It is important to define how to handle the individual file types.
For more information, see Setup, Imports, Imports Setup.
Open the Imports Page
On the homepage of your Microsoft Business Central, click on the action group NAVAX Payment, on the action Imports, or ☰ > NAVAX Payment > Imports if you are not in the Accountant role.
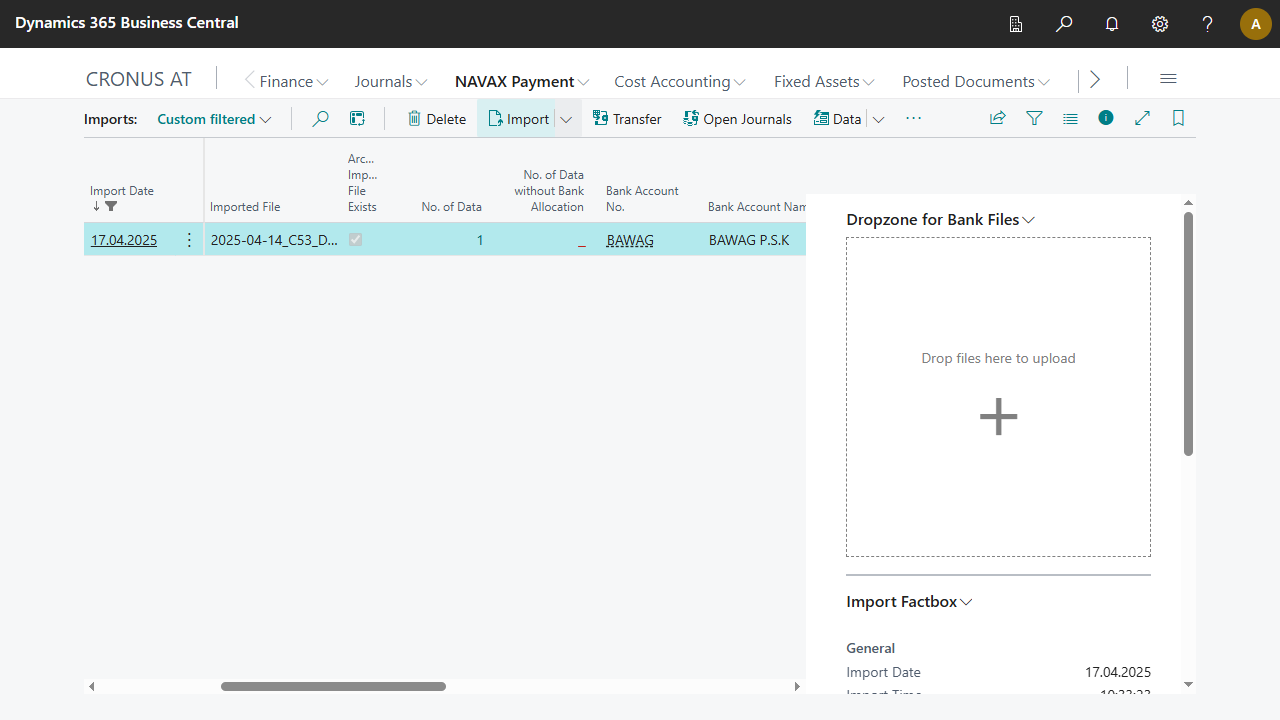
Import File
Click on the action Import.
Tip
Files can also be imported via the drop zone for bank files using Drag & Drop. Simply drag the file into the Dropzone for Bank Files area (found in the fact boxes on the right side), and the import will start automatically.
For more information, see Tasks, Imports, Dropzone for Bank Files.
Assign Bank Accounts (if necessary)
The import is performed, loads the data into Business Central, and automatically assigns the bank account. Correct setup is required for this.
For more information, see Setup, General, Bank Account Setup.
If not all bank accounts were automatically identified, click on Data and manually select the Bank Account No. or use the action Suggest Bank Account. To do this, click on the action Data and select the Bank Account No. on the page that opens.
Review Imported Lines
As long as no Journal Line/Matching Line exists for an import line, you can still delete the line or change the bank account. To re-import deleted data, repeat all steps and perform the Import again.
Use the action Data to view the bank statement data. All relevant data is clearly listed here.
With the action Transactions, you can call up an overview of the individual posting lines. This overview shows you all posting lines linked to the bank statement and can help with analysis or provide an overview of the bank statement positions.
Note
If a file has already been imported or a file with the same Message Reference is imported, a warning will be displayed. This warning can be ignored if you want to re-import the file. If you do not want to re-import the file, click No.
Step-by-Step Instructions: Automated Import with the NAVAX konfipay Connector
This section describes how to import a bank statement file using the NAVAX konfipay Connector Import. The NAVAX konfipay Connector Import extension is integrated into the NAVAX Payment Imports and allows you to import bank statements directly via the konfipay Online Payment Services.
Make Basic Settings
Ensure that the basic settings in the NCP Imports Setup and konfipay Connector Setup have been configured.
It is important that the konfipay Online Payment Services are correctly set up and the connection to the banking data centers works. It is also important to define how to handle the individual file types.
For more information, see Setup, konfipay Connector, konfipay Connector Setup.
Open the Imports Page
On the homepage of your Microsoft Business Central, click on the action group NAVAX Payment, on the action Imports, or ☰ > NAVAX Payment > Imports if you are not in the Accountant role.
Retrieve Account Transaction Entries
If the account transaction entries are already available in Business Central, open the Account Transaction Entries page.
If no account transaction entries have been imported yet, open the submenu of the Import action and select Retrieve Account Transaction Entries.
A window will open where you can select the desired bank connection. Click OK to start the import. After the download is complete, the Account Transaction Entries page will automatically open, displaying all imported account transaction entries.
Setup, General, Bank Account Setup The NCP Bank Account Setup page is the central management interface for all bank accounts used in NAVAX Payment Processing. Here you enter and maintain all bank master data required for payment processing, exports, and imports in Microsoft Dynamics 365 Business Central...
Setup, Imports, Imports Setup To make optimal use of the NAVAX Payment Import, a basic setup is required first. In the NCP Imports Setup window, you configure all central settings and specifications necessary for importing and further processing payment transaction data...
Setup, konfipay Connector, konfipay Connector Setup This section explains how to set up and use NAVAX konfipay Connector Export/Import in Microsoft Dynamics 365 Business Central. NAVAX konfipay Connector Export/Import enables you to automate payment processes and securely exchange banking data...
Tasks, Imports, Dropzone for Bank Files This chapter describes the functionality of the Dropzone for bank files in Business Central. The Dropzone is a feature that allows bank files to be imported quickly and easily via Drag & Drop. The file is automatically checked for validity and imported into Business Central...
Archive, Imports, Import Operations & Transaction Overview On this page you can see the overview of the imported bank files. For each of the imported files a Import line is created, these in turn can have several transaction lines and remittance info lines...
Archive, konfipay Connector, Account Transaction Entries An account transaction file is a file that contains all the transactions of a bank account, including the resulting balance. A special variant is the electronic account statement, where the account statement data, for example in online banking, is provided in file format...