Build Excel reports directly within Microsoft Dynamics 365 Business Central.
Current Version: 26.3.12.0as of Business Central 26. For older BC versions, downgrades are available. AppSource Name: Excel Report Builder
Manual
Creation date: 2026/06/14 The current version of this manual can be found at:
☰ Contents
General
Excel Report Builder Each Microsoft Dynamics 365 Business Central solution contains valuable information that can be used for strategic decisions...
Role Center Integration The Excel Report Builder is integrated into the Accountant and Accounting Manager roles and expands them with the Excel Report Builder menu item...
Quick Guide
Setup First, open the setup page via Search...
Edit Evaluations More information will follow soon...
Execute Evaluations More information will follow soon...
Setup
Excel Report Builder Setup In the Excel Report Builder Setup page the general settings and defaults for the Excel Report Builder are defined...
Excel Functions In the Excel Functions Setup page the Excel Functions are set up, which can then be selected in the Formulas of the Excel Evaluations. The page can be opened in the Excel Report Builder Setup via the corresponding action in the Setup group...
Evaluation Groups In the Excel Evaluation Groups page you can set up groups for the evaluations. The page can be opened in the Excel Report Builder Setup via the corresponding action in the Setup group...
Blocked Tables In the Blocked Tables page you can specify tables that are not allowed in Excel Evaluations. If a blocked table is used in an evaluation, the evaluation cannot be executed...
Edit Evaluations
General
Edit Excel Evaluation Excel Evaluations are managed or created via the Excel Report Builder Evaluations page...
Download Area The Download Area provides a selection of free evaluations that you can download and use...
Import Analysis The analysis mode in Business Central can be used to create analyses directly in the list pages...
Data Sheets
Data Sheet Via Data Sheets, sheets with data from tables can be added to the Excel workbook...
Sheet Settings The Sheet Settings page is used to set up the general settings of the Data Sheet...
Table Settings The Table Settings page is used to set up a table of a Data Sheet...
Date Filter Variables It is possible to specify [Variables] in date filters that will be calculated and replaced based on the Evaluation Date when the evaluation executed...
Field Settings The Field Settings page is used to set up a field of a Data Sheet. Depending on the type of field, different settings are available or possible...
Formulas Formulas can be composed of Excel Functions, fixed and dynamic references, [Variables], constants and operators. However, it is also possible to simply specify a text, which is then written to the Excel cells when the evaluation is executed...
Text Settings The Text Settings page is used to set up a text line of a Data Sheet...
PivotTable Sheets
PivotTable The PivotTable page is used to set up the general settings of the PivotTable and the fields of the PivotTable...
Sheet Settings The Sheet Settings page is used to set up the general settings of the PivotTable Sheet...
Field Settings The PivotTable Field Settings page is used to set up a field of a PivotTable...
Other Sheets
Text Sheet Via Text Sheets, sheets with text can be added to the Excel workbook...
Information Sheet Via the Information Sheet, a sheet with information about the evaluation can be added to the Excel workbook...
Extended
User Permissions The User Permission field on the evaluation card specifies whether the evaluation may be executed only by the user responsible for the evaluation, by all users, or only by a restricted group of users...
Subscribers The No. of Subscribers field on the evaluation card shows the number of users who have added the evaluation to their My Excel Evaluations list...
Email Recipients The No. of Email Recipients field on the evaluation card shows the number of recipients to be suggested in the email when using the Send by Email action...
Copy, Export & Import
Tips & Tricks
Get month name from date If you want to determine the month name from a date field, it is best to use Text Formatting in the Field Settings of the date field...
Get data via sheet reference
VAT Amount Lines The table 290 ∙ VAT Amount Line can be added to the following purchase, sales, and service tables. The data is then calculated automatically...
Execute Evaluations
My Excel Evaluations In the My Excel Report Builder Evaluations page you can arrange and manage your personal list of Excel Evaluations that you are allowed to execute...
Execute Excel Evaluation Via the Execute action, an evaluation can be executed. This creates an Excel workbook on your device...
Evaluation Filters In the Excel Evaluation Filters page you can specify the filters for the execution of the evaluation...
Analyze Data in Excel Analyze Data in Excel empowers you to understand your data through natural language queries that allow you to ask questions about your data without having to write complicated formulas. In addition, Analyze Data provides high-level visual summaries, trends, and patterns...
Send Excel Evaluation by Email Via the Send by Email action, an evaluation can be executed and then sent by email...
Archive Excel Evaluation Via this action, an evaluation can be archived. This will execute the evaluation and save the Excel workbook in the archive...
Evaluation Archive The Excel Evaluation Archive page shows an overview of all archive entries of the evaluation and can be accessed directly via the evaluation, or via My Excel Evaluations...
Information for Developers
Runnable Codeunits On the Excel Evaluation Card page, a Codeunit for the evaluation can be specified in the Codeunit to Run field. This can be used, for example, to display notes or to recalculate or update data directly before the evaluation is executed...
Temporary Data Codeunits Temporary Data CodeunitWith the help of temporary data codeunits, evaluations can be extended with functions that temporarily calculate certain data of the evaluation during execution...
Connector Via the codeunit NCE Connector Excel Evaluations can also be called or integrated from other extensions or from elsewhere...
API Evaluations can also be generated externally using the Excel Report Builder via an API. The created Excel file is returned in Base64 format. For an evaluation to be visible in the API and to be executed via the API, the Allow API Access field must be specified on the Excel Evaluation Card...
Appendix
System Requirements & Limits To execute an evaluation or create an Excel workbook, Excel is not required and therefore does not need to be installed...
Import old NC Cube files It is possible to import old NC Cube files (file name extension .nccx) via the import action. When importing an old NC Cube file, an attempt is made to import or convert as much information as possible from the file...
NAVAX License Management The NAVAX License Management page (in older versions NAVAX License Overview or NCEX License Overview) displays the current license status of the NAVAX extensions...
Comparison with BC Standard and NC Cube Would you like to know what advantages the Excel Report Builder offers compared to the Business Central Standard...
Each Microsoft Dynamics 365 Business Central solution contains valuable information that can be used for strategic decisions.
With Excel Report Builder you get an Excel-based reporting tool that allows you to prepare and analyze this existing data material quickly and easily. From simple evaluations to cross-company evaluations with multiple worksheets, Excel Formulas, PivotTables and PivotCharts - Excel Report Builder offers you a wide range of options.
Excel Report Builder requires no special software. The Excel evaluations are created and executed directly in your familiar Dynamics 365 Business Central working environment. However, in order for a user to open and view a created Excel workbook, a corresponding program must be installed. Basically Microsoft Excel is recommended, but you can also use OpenOffice, Office on an Android, iPhone or iPad.
The Download Area provides a selection of free evaluations that you can download and use. It is also possible to import existing Analyses from the analysis mode of a page in order to create evaluations from them.
Navigation
Excel Report Builder is integrated into the Accountant and Accounting Manager roles, but can be accessed from any role via the Search function.
For more information, see General, Role Center Integration.
The search terms "excelreportbuilder", "nvxerb", "ncerb" and "navax" are recognized by "Tell me what you want to do".
Note
The Excel Report Builder was developed with the prefix NCE resp. NVXE.
NCE resp. NVXE stands for NAVAX Consulting resp. NAVAXExcel Report Builder.
Permission Sets
The following permission sets are available for the Excel Report Builder:
Name
Description
NCE, MY EVALUATIONS
Excel Report Builder My Eval.
You need these permissions to execute Excel Evaluations via My Excel Report Builder Evaluations.
For more information, see Execute Evaluations, My Excel Evaluations.
Excel Report Builder Setup
You need these permissions to set up the Excel Report Builder.
For more information, see Setup, Excel Report Builder Setup.
NCE, API
Excel Report Builder API
If Excel Evaluations are also to be executed via the API, this permission set must be added to the Microsoft Entra Application or, in the case of an on-premises installation, to the API user.
For more information, see Information for Developers, API.
Docs / App / Excel Report Builder / General Role Center Integration
The Excel Report Builder is integrated into the Accountant and Accounting Manager roles and expands them with the Excel Report Builder menu item.
A call via the Search function (search terms "excelreportbuilder", "nvxerb", "ncerb" and "navax") is possible from any role.
Excel Report Builder consists of two parts:
The first part consists of the creation and editing of Excel Evaluations.
The second part is the My Excel Report Builder Evaluations part from where users usually execute the Evaluations. Here, each user can arrange and manage a personal list of Evaluations.
For more information, see Execute Evaluations, My Excel Evaluations.
The My Excel Report Builder Evaluations list is also integrated as a Role Center list.
First, open the setup page via Search:
In the Excel Report Builder Setup page the general settings and defaults for the Excel Report Builder are defined.
For more information, see Setup, Excel Report Builder Setup.
Excel Functions
Next, open the Excel Functions using the corresponding action in the Excel Report Builder Setup. Via the Download action the setup can be created or updated quickly and easily.
For more information, see Setup, Excel Functions.
Evaluation Groups
Optionally, you can set up Groups for the evaluations.
For more information, see Setup, Evaluation Groups.
Blocked Tables
Via the System area in the Excel Report Builder Setup page you can also optionally specify tables that are not allowed in Excel evaluations.
For more information, see Setup, Blocked Tables.
License Management
The NAVAX License Management page displays the current license status of the NAVAX extensions resp. the Excel Report Builder. A NAVAX extension can be tested or used free of charge for 30 days after installation. After that, the extension can only be used with a valid license.
For more information, see Appendix, NAVAX License Management.
Permission Sets
The following permission sets are available for the Excel Report Builder:
For more information, see General, Excel Report Builder.
In the Excel Report Builder Setup page the general settings and defaults for the Excel Report Builder are defined.
Note
For licensing, calling the online help and performing some actions, access to https://www.navax.app must be allowed.
For more information, see Appendix, Installation Notes.
General, Fields
File Name
Specifies a default file name for the evaluations.
It is possible to specify [Variables] in the file name that will be replaced by actual values when the evaluation is executed. The variables can be selected via a lookup.
If the field is empty, a file name is generated by the system.
Tip
The lookup shows the available variables as well as a preview based on the currently specified variables.
Disable OneDrive
Specifies whether the OneDrive integration (Actions Open in OneDrive and Share) should be disabled in the evaluations.
For more information, see Execute Evaluations, Execute Excel Evaluation.
Specifies whether the automatic addition of prefixes to Excel Functions should be deactivated. Certain functions must be transferred to Excel with a prefix (can be set for each function), otherwise they will cause problems or will not be calculated. Adding is done automatically when the evaluation is executed, but can be deactivated if necessary.
For more information, see Setup, Excel Functions.
Archive Size
This can be used to limit the maximum number of archive entries per user for evaluations where no archive size is specified.
Default Styles, Fields
Excel Table
Specifies a default style for the Excel Tables of the evaluations.
PivotTable
Specifies a default style for the PivotTables of the evaluations.
Classic PivotTable Layout
Specifies whether the PivotTable should be created in Classic Layout by default. The Classic Layout enables dragging of fields in the grid.
Slicer
Specifies a default style for the PivotTable Slicers of the evaluations.
Timeline
Specifies a default style for the PivotTable Timelines of the evaluations.
Setup, Actions
Excel Functions
View or set up the Excel Functions for the Excel Evaluations.
For more information, see Setup, Excel Functions.
Evaluation Groups
View or set up the Groups for the Excel Evaluations.
For more information, see Setup, Evaluation Groups.
System, Actions
NAVAX License Management
Opens the NAVAX License Management which displays the current license status of the NAVAX extensions.
For more information, see Appendix, NAVAX License Management.
Blocked Tables
Here you can specify tables that are not allowed in Excel Evaluations.
For more information, see Setup, Blocked Tables.
Translate all Excel Functions
This action can be used to translate the Excel Function names in the Formulas of all evaluations into English Excel Function names after upgrading the old NC Cube version to Business Central.
Note
Only users with the SUPER permission set can perform this action.
The action should only be executed once per client. If you translate German Formulas, for example, the option Replace Semicolons in Formulas is also set by default. If you run the translation again, the semicolons that were replaced by commas the first time will be incorrectly replaced by dots.
In the Excel Functions Setup page the Excel Functions are set up, which can then be selected in the Formulas of the Excel Evaluations. The page can be opened in the Excel Report Builder Setup via the corresponding action in the Setup group.
For more information, see Setup, Excel Report Builder Setup.
Tip
Via the Download action the setup can be created or updated quickly and easily.
Note
Note that in evaluations the English Excel Function names, commas instead of semicolons and dots as decimal separators must be used. This makes the data independent of the visualization and therefore also independent of language, region and country settings. When a user opens the workbook, the data is automatically displayed in the format he or she has set.
The help provided by Microsoft for each function as well as an overview of all functions can be displayed or opened in English and in your display language.
Fields
Name
Specifies the name of the function.
Description
Specifies information about the function.
Category
Specifies to which category the function belongs.
_xlfn. Prefix
Specifies whether the prefix _xlfn. should be added to the function. Certain functions must be transferred to Excel with this prefix, otherwise they will cause problems or will not be calculated. Adding is done automatically when the evaluation is executed.
ID
Specifies the ID assigned to the function by Microsoft. Only if the correct ID is specified, the help for the function can be called.
Language related name fields
Specifies the name of the function in the respective language.
These fields are displayed when selecting an Excel Function depending on the display language to make it easier to search for a function or the English Excel Function name.
When setting up the formula of an evaluation, an action for translating the Excel Functions from another language is also available. The action uses the language related name fields for the translation.
Actions
Download
Via this action the Excel Functions can be downloaded and thus the setup can be created or updated quickly and easily.
Import / Export
Via Import and Export the Excel Functions can be imported from a file or exported to a file.
Help
Opens an external website that displays detailed information about the function in English.
Help (Translated)
Opens an external website that displays detailed information about the function in your display language.
Function Overview
Opens an external website that displays all functions in alphabetical order in English.
Function Overview (Translated)
Opens an external website that displays all functions in alphabetical order in your display language.
In the Excel Evaluation Groups page you can set up groups for the evaluations. The page can be opened in the Excel Report Builder Setup via the corresponding action in the Setup group.
For more information, see Setup, Excel Report Builder Setup.
Fields
Code
Specifies the code of the group.
Description
Specifies a description of the group.
No. of Evaluations
Specifies the number of evaluations assigned to the group.
In the Blocked Tables page you can specify tables that are not allowed in Excel Evaluations. If a blocked table is used in an evaluation, the evaluation cannot be executed.
Note
Regardless of whether you lock tables or not, the following always applies:
In order for a user to execute an evaluation, they must be authorized to read the data (tables) to be evaluated.
The page can be opened in the Excel Report Builder Setup via the corresponding action in the System group.
For more information, see Setup, Excel Report Builder Setup.
Fields
Table No.
Specifies the number or the object ID of the table that is blocked for Excel Evaluations.
Excel Evaluations are managed or created via the Excel Report Builder Evaluations page.
Tip
The Download Area action opens the Download Area from where you can download free evaluations. An analysis from the analysis mode of a page can also be a good starting point for an evaluation.
If a new evaluation is created or an existing evaluation is edited, the Excel Evaluation Card opens where the general settings and the individual Excel sheets of the evaluation can be set up.
Via the Add action in the Sheets area Excel sheets can be added to the evaluation.
Note
There must be at least one active sheet for an evaluation to be executed. A Data Sheet is automatically suggested when creating a new evaluation.
General, Fields
Code
Specifies the code for the evaluation.
Description
Specifies a description for the evaluation.
Comments
Displays the first comment line if there are comments for the evaluation. Click on the field to view or edit the comments.
Specifies which user is responsible for the evaluation.
User Permission"
Specifies whether the evaluation may be executed only by the user responsible for the evaluation, by all users, or only by a restricted group of users.
Regardless of the selected option, the following always applies:
In order for a user to execute an evaluation, they must be authorized to read the data (tables) to be evaluated.
Tip
Select the Responsible User option as long as the evaluation is not yet fully set up.
Restricted Group
Specifies the number of users who are allowed to execute the evaluation if User Permission Restricted Group is set.
Click on the field to manage the permissions.
For more information, see Edit Evaluations, Extended, User Permissions.
No. of Subscribers
Specifies the number of users who have added the evaluation to their My Excel Evaluations list.
Click on the field to manage or change the assignments.
For more information, see Edit Evaluations, Extended, Subscribers.
No. of Email Recipients
Specifies the number of recipients to be suggested in the email when using the Send by Email action.
Click on the field to manage or change the recipients.
For more information, see Edit Evaluations, Extended, Email Recipients.
Specifies a file name for the evaluation.
It is possible to specify [Variables] in the file name that will be replaced by actual values when the evaluation is executed. The variables can be selected via a lookup.
If the field is empty, the default setting from the Excel Evaluation Setup will be used.
Tip
The lookup shows the available variables as well as a preview based on the currently specified variables.
Evaluation Date Formula
Specifies a date formula for the Evaluation Date.
Note
It is possible to specify [Variables] in date filters that will be calculated and replaced based on the Evaluation Date when the evaluation is executed. As Evaluation Date the Work Date is suggested.
The suggested date can be additionally modified via the Evaluation Date Formula.
For more information, see Edit Evaluations, Data Sheets, Date Filter Variables.
Fixed Evaluation Date
Specifies a fixed date that should be suggested as the Evaluation Date when the evaluation is executed.
Codeunit to Run
Specifies a codeunit to run when the evaluation is executed. This can be used, for example, to display notes or to recalculate or update data directly before the evaluation is executed.
For more information, see Information for Developers, Runnable Codeunits.
Direct Execution
Specifies whether the filter page should be displayed immediately when the evaluation is executed. If no filter page exists for the evaluation, the Excel workbook is created immediately. Normally, when an evaluation is executed, a confirmation page is displayed first, which can be used to schedule the evaluation, for example. This setting does not affect the archiving of an evaluation.
Archive Size
Specifies whether there should only be a certain maximum number of archive entries per user for the evaluation. If the evaluation is archived and the value is exceeded, the oldest entries in the archive are deleted.
If the field is empty, the default setting from the Excel Evaluation Setup will be used.
Tip
For example, you can schedule the Archive Excel Evaluation action so that the evaluation is archived once per day "visible to all users".
By specifying in the Archive Size field, you can determine how many days the archived evaluation will be available in the archive.
If the value 1 is specified in the Archive Size field, only the most recent version of the evaluation is available in the archive.
Executes the evaluation, saves the Excel workbook in your Business Central folder in OneDrive and opens it in a new window so you can manage or share the file.
The action is only available if OneDrive is available.
For more information, see Execute Evaluations, Execute Excel Evaluation.
Share
Executes the evaluation, saves the Excel workbook in your Business Central folder in OneDrive and shares the file. You can also see who it's already shared with.
The action is only available if OneDrive is available.
For more information, see Execute Evaluations, Execute Excel Evaluation.
Imports an analysis from the analysis mode of a page and creates an Excel Report Builder evaluation from it.
For more information, see Edit Evaluations, General, Import Analysis.
Comments
View the comments for the evaluation.
Sheets
In the Sheets area the Excel sheets of the evaluation are created or managed.
Sheets can be added to the evaluation via the Add action.
The following sheets are available, each with different properties:
Creates a copy of the current sheet.
Data Sheets can be copied with or without PivotTables.
Insert sheet from...
Can be used to insert a Data Sheet or a Text Sheet from another evaluation.
Data Sheets can be copied with or without PivotTables.
Sheets, Fields
Sheet
Displays information about the sheet. The sheet can be displayed or set up via the Edit action or by clicking on the field.
Connected Data Sheet
Displays which Data Sheet a PivotTable is connected to.
Active Sheet
Specifies whether the sheet should be the active sheet after the evaluation is executed and opened in Excel.
Disabled
Specifies whether the sheet should be taken into account when executing the evaluation or not.
Sheets, Actions
Add
Inserts a new sheet.
Edit
View or set up the sheet.
Copy
Inserts a copy of the current sheet.
Up / Down
The position or the order of the selected sheets can be changed with Up and Down.
Docs / App / Excel Report Builder / Edit Evaluations / General Download Area
The Download Area provides a selection of free evaluations that you can download and use.
Via the Download action an evaluation can be downloaded and created.
Fields
Group
Specifies the group of the evaluation.
Description
Specifies the description of the evaluation.
Information
Displays information about the evaluation.
Zip File
Indicates whether multiple evaluations are combined in a zip file.
Preview
Displays a preview (image or video) of the evaluation.
New
Indicates whether the evaluation was recently added to the Download Area.
Date Modified
Specifies when the evaluation was last modified.
Actions
Download
Via this action the evaluation can be downloaded and created. This will open the import page where further settings can be made.
Preview
Opens an external website that displays a preview (image or video) of the evaluation.
The analysis mode in Business Central can be used to create analyses directly in the list pages.
For more information, see Analyze list page and query data using data analysis feature
Even if the analysis mode is not suitable for more complex evaluations, formulas, Excel functions etc., an analysis can still be a good starting point for an Excel Report Builder evaluation.
The Import Analysis action on the Excel Report Builder Evaluations page can be used to import an analysis from the analysis mode of a page. The tables, filters and fields of the page or analysis are determined and an evaluation with a data sheet and, depending on the structure of the analysis, a PivotTable sheet is created.
Note
The action is only available as of Business Central 24.
Analyses based on a Query cannot be imported resp. do not result in meaningful evaluations.
Import from
Analysis Page
Specifies from which page and from which user an analysis should be imported.
All pages for which you have created analyses in the analysis mode are displayed in the selection. If you remove the filter in the User ID field, analyses of other users are also displayed.
Analysis Name
Specifies which analysis should be imported.
Visible columns only
Specifies whether only the columns required/displayed for the analysis or all columns are to be transferred to the data sheet of the evaluation.
Include Analysis Filters
Specifies whether the analysis filters are to be transferred to the evaluation.
Import to
Code
Specifies the code for the new evaluation.
Description
Specifies a description for the new evaluation.
Code already Exists
Specifies whether an evaluation with the code already exists.
An additional confirmation is necessary for replacing an evaluation.
Keep User Permissions
Specifies whether existing User Permissions of an evaluation should be retained when replacing an evaluation.
For more information, see Edit Evaluations, Extended, User Permissions.
Keep Subscribers
Specifies whether existing Subscribers of an evaluation should be retained when replacing an evaluation.
For more information, see Edit Evaluations, Extended, Subscribers.
Keep Email Recipients
Specifies whether existing Email Recipients of an evaluation should be retained when replacing an evaluation.
For more information, see Edit Evaluations, Extended, Email Recipients.
Docs / App / Excel Report Builder / Edit Evaluations / Data Sheets Data Sheet
Via Data Sheets, sheets with data from tables can be added to the Excel workbook.
The Data Sheet page is used to set up the sheet.
The general settings of the Data Sheet can be set up via the Sheet Settings action.
For more information, see Edit Evaluations, Data Sheets, Sheet Settings.
Add
Via the Add action lines can be added to the sheet.
Depending on the selected line from which the action is called, different options are available.
Table ⭮
Adds a top-level table or a new tree structure to the Data Sheet.
The option is only available if no lines have been created yet or if a top level line is selected when calling the Add action.
If the option is selected, an overview with all available tables opens.
The Search icon at the top of the page can be used to search for a table.
The Field Search action can be used to search for a specific field, similar to the table search. Both searches can also be combined.
The selected table can be added to the Data Sheet with Ok and then displayed or set up via the Edit action or by clicking on the Settings field.
For more information, see Edit Evaluations, Data Sheets, Table Settings.
[Table Name] > Fields
Adds fields to a table or a field with a related table.
The option is available if a table or a field with a related table (indicated by the 🞥 symbol) is selected when calling the Add action.
Note: [Table Name] = Name of the table to which the option applies.
If the option is selected, an overview of all available fields of the table opens.
The Search icon at the top of the page can be used to search for a field.
In addition, various actions are available for filtering the fields.
Tip
You can add multiple fields to the Data Sheet at once by selecting multiple fields.
The selected fields can be added to the Data Sheet with Ok and then displayed or set up via the Edit action or by clicking on the Settings field.
For more information, see Edit Evaluations, Data Sheets, Field Settings.
Note
Field 🞥
If a field has a fixed 1:1 relationship to a table, it is marked with a 🞥 symbol. In this case, fields from the related table can be added to the Data Sheet directly and without additional table settings.
[Table Name] > Formula Field
Adds a formula field to a table or a field with a related table.
The option is available if a table or a field with a related table (indicated by the 🞥 symbol) is selected when calling the Add action.
Note: [Table Name] = Name of the table to which the option applies.
Formulas can be composed of Excel Functions, fixed and dynamic references, [Variables], constants and operators. However, it is also possible to simply specify a text, which is then written to the Excel cells when the evaluation is executed.
If a calculation is to be performed in a formula, it begins with an equal sign.
The formula can be set up by clicking on the formula field.
For more information, see Edit Evaluations, Data Sheets, Formulas.
[Table Name] > Child Table ⭮
Adds a child table to a table.
The option is available if a table or field is selected when calling the Add action.
Note: [Table Name] = Name of the table to which the option applies.
The table is selected in the same way as for the Table ⭮ option.
In addition, the following actions are available on the selection page:
Relations to the Table
This action can be used to display only tables for which a simple relation to the table exists.
Relations from the Table
This action can be used to display only tables to which a simple relation via fields from the table exists.
Note
When a table is added as a child or parent table, related fields between child and parent table are automatically suggested. Check, add or change the suggested relations in the child table via the Table Settings.
[Table Name] ⮌ Parent Table ⭮
The option is similar to the [Table Name] > Child Table ⭮ option with the difference that it can be used to add a parent table to a table.
The option is only available if a table is selected when calling the Add action.
Text Line ≡
Adds a text line to the Data Sheet.
Text lines are only allowed on top level and the option is only available if no lines have been created yet or if a top level line is selected when calling the Add action.
Via text lines e.g. general descriptions can be added to the Data Sheet.
The text line can be displayed or set up via the Edit action or by clicking on the settings field.
For more information, see Edit Evaluations, Data Sheets, Text Settings.
Text lines can also be used in combination with formulas to specify parameters for calculations or to perform calculations over the entire Data Sheet.
A simple example with a text line as parameter for a limit value can be found in Example 1 at Edit Evaluations, Data Sheets, Formulas.
Another example, where text lines are used for sum calculations, can be found in the example on parallel tree structures at Edit Evaluations, Data Sheets, Table Settings.
The formula of a text line can be set up by clicking on the formula field.
For more information, see Edit Evaluations, Data Sheets, Formulas.
Company Loop 🗲
Adds the 20000006 ∙ Company table to the Data Sheet to set up cross-company evaluation.
When running through the records of the table, a company change is performed for all child tables.
The company change can also be deactivated in the table settings if required.
The option is available via the More Options... selection if a top-level line is selected when calling the Add action.
If a table is selected when the Add action is called, the [Table Name] ⮌ Parent Company Loop 🗲 variant is available and the Company Loop is added as a parent table to the table.
Tip
As an example, you can download the evaluation Inventory by Company in the Download Area, which includes a company loop.
For more information, see Edit Evaluations, General, Download Area.
Date Loop 🗲
Adds the 20000007 ∙ Date table to the Data Sheet.
A date loop can be useful in connection with child tables, for example, if the date is used for setting a FlowFilter.
For the date table it is mandatory to specify a filter for the Period Type and a range filter for the Period Start in the table settings.
The option is available via the More Options... selection if a top-level line is selected when calling the Add action.
If a table is selected when the Add action is called, the [Table Name] ⮌ Parent Date Loop 🗲 variant is available and the Date Loop is added as a parent table to the table.
Tip
As an example, you can download the evaluation Resource Load in the Download Area, which includes a date loop.
For more information, see Edit Evaluations, General, Download Area.
Temporary Data Codeunit 🗲
Adds a Temporary Data Codeunit including its fields and filters to the Data Sheet.
The option is available via the More Options... selection if a top-level line is selected when calling the Add action.
If a table is selected when the Add action is called, the [Table Name] > Temporary Data Codeunit 🗲 variant is available.
With the help of temporary data codeunits, evaluations can be extended with functions that temporarily calculate certain data of the evaluation during execution.
This makes it possible, for example, to evaluate data that is normally not available or not available in this form.
For more information, see Information for Developers, Temporary Data Codeunits.
[Table Name] Notes ⭮ / Links ⭮
Adds the 2000000068 ∙ Record Link table to a table in the Data Sheet to output the notes or links of the records.
The option is available via the More Options... selection if a table is selected when the Add action is called.
Note: [Table Name] = Name of the table to which the option applies.
For most records, notes and links can be added in the cards, documents and lists via a FactBox.
The notes and links are stored in the Record Link table and are related to the records via a RecordID.
The option adds the table and fields and sets all necessary filters and relations.
Insert Data Sheet from...
Can be used to add the lines of a Data Sheet to the current Data Sheet. Data sheets can also be copied into themselves.
The option is available via the More Options... selection.
Fields
Table/Field
Displays information about the line.
The following symbols are displayed or used in the line information:
⭮
Indicates that this is a table.
🗲
Indicates that a special action is performed for the table.
Field 🞥
If a field has a fixed 1:1 relationship to a table, it is marked with a 🞥 symbol. In this case, fields from the related table can be added to the Data Sheet directly and without additional table settings.
<Field>
A field in angle brackets indicates that it is an internal field.
Specifies an Variable that can be used to reference or access the field value in formulas.
A variable must begin with [ followed by a unique ID and end with ]. The brackets are added automatically when the variable is entered.
Formula
Formulas can be composed of Excel Functions, fixed and dynamic references, [Variables], constants and operators. However, it is also possible to simply specify a text, which is then written to the Excel cells when the evaluation is executed.
If a calculation is to be performed in a formula, it begins with an equal sign.
Click on the field to set up the formula.
For more information, see Edit Evaluations, Data Sheets, Formulas.
The Sheet Settings page is used to set up the general settings of the Data Sheet.
Fields
Sheet Name
Specifies a name for the sheet.
If no name is specified, the type of the sheet or the Use as Sheet Name Setting is used.
It is additionally possible to specify the placeholder %1 in the text, which is replaced by the type of the sheet or the Use as Sheet Name Setting.
Use as Sheet Name
Specifies a Data Sheet line to be used as the name for the sheet.
Add Filters
Specifies whether the filters of the Data Sheet should be added to the worksheet.
Column Headers
Specifies whether or not to add column headers in the worksheet.
If there are several parallel tree structures and thus several specifications for a column in the sheet, the first tree structure or the first occurrence determines the header.
Column Filters
Specifies whether to turn on filtering for the Column Headers.
Freeze Top Rows
Specifies whether, and if so, how many top rows should remain visible while scrolling through the rest of the worksheet.
Freeze First Columns
Specifies whether, and if so, how many first columns should remain visible while scrolling through the rest of the worksheet.
Excel Table
Specifies whether the data should be formatted as an Excel Table.
Table Style
Specifies a style for the Excel Table.
If the field is empty, the default setting from the Excel Evaluation Setup will be used.
Total Row
Specifies whether to turn on or off the total row of the Excel Table.
The Total Row Type can be set for each field individually via the Field Settings of the Data Sheet line(s).
Banded Rows
Specifies whether to display banded rows, in which even columns are formatted differently from odd rows.
Banded Columns
Specifies whether to display banded columns, in which even columns are formatted differently from odd columns.
First Column
Specifies whether to display special formatting for the first column of the Excel Table.
Last Column
Specifies whether to display special formatting for the last column of the Excel Table.
Print, Fields
Orientation
Specifies the default print format for the worksheet.
Fit width to pages
Specifies whether the size of the worksheet should be adjusted to fit on the specified number of pages.
Rows to repeat at top
Specifies a range to be printed on each page. For example, you can specify '$1:$1' for the first row of the worksheet.
Columns to repeat at left
Specifies a range to be printed on each page. For example, you can specify '$A:$B' for the first two columns of the worksheet.
Page Order
Specifies the sequence in which the worksheet data is numbered and printed if it does not fit on one page.
The Table Settings page is used to set up a table of a Data Sheet.
Fields
Table
Specifies for which table the settings are specified.
Name
Specifies a name for the table. If no name is specified, the default caption of the table is used.
It is possible to specify the placeholder %1 in the text, which is replaced by the default caption of the table.
Sorting
Specifies by which fields the records should be sorted.
Order
Specifies whether the records should be sorted in ascending or descending order.
Disable Company Change
Specifies whether the Company table should perform a company change or not.
This field is only available for a Company Loop (Table 2000000006 ∙ Company).
Max. No. of Records
Specifies a maximum number of results for a 1:n relationship.
When the limit is reached, no more records are output.
Add Blank Record
Specifies whether an empty record should also be added in a 1:n relationship.
The setting can be useful especially in connection with child tables where the table is used for setting a FlowFilter.
Parallel Tree Structure
Specifies whether the tree structure should be output parallel to the previous tree structure.
Normally tables and fields of a Data Sheet are handled serially. I.e. for each field another Excel column is added.
Parallel tree structures can be used to output parts of a Data Sheet parallel to each other.
The tree structures share the same columns and are output one below the other.
Example
The example can be downloaded in the Download Area.
The following Data Sheet was created:
The following result is displayed in Excel after executing the evaluation:
Tip
Folgende Formeln wurden für die Berechnung der Summen verwendet:
Customer Total =SUMIF( [TC:COL]:[TC:COL] , "Customer" , [BC:COL]:[BC:COL] )
Vendor Total =SUMIF([ TV:COL]:[TV:COL] , "Vendor" , [BV:COL]:[BV:COL] )
Example 2
The example can be downloaded in the Download Area.
The requirement in this example was to display all sales documents for a customer.
The documents should be displayed indented by one field under the customers.
Using a small "trick", such evaluations can also be implemented.
The following Data Sheet was created:
The trick is to subordinate the Customer table to the Customer table in a 1:1 relationship. After that, the Sales Header table can be output parallel to the subordinate customer. Both subordinated tables are linked to the superordinated customer table.
The indentation is created with an empty formula field (Spacer).
The following result is displayed in Excel after executing the evaluation:
Note
The following rules apply to parallel tree structures:
When executing the evaluation, parallel tree structures are only treated as such if they are defined directly one after the other and on the same level.
The Parallel Tree Structure field only needs to be set in the following tree structure(s), not in the first one.
The number of fields do not have to match in the parallel tree structures. The tree structure with the most fields determines how many columns are output in Excel.
The column headers are determined by the first tree structure or, if more columns are defined in subsequent tree structures, the first occurrence.
Fields from a parallel tree structure cannot be added to a PivotTable directly but only indirectly via the first tree structure.
Since there are multiple specifications for a column in the sheet due to parallel tree structures, there are also multiple Field Settings for a field.
Depending on the setting, either the setting of the first tree structure or the largest specified value is taken.
There are also settings that become active as soon as they are set for one of the columns.
Disable 'Add Filter'
Specifies whether additional filters can be added to the table in the Filter Page when the evaluation is executed.
The filter page is displayed if filters are specified for a table that are not hidden (Filter Type).
Parent Table
If the table is subordinated to another table, additional table settings are available.
Parent Table
Displays the parent table of the table.
Relationship
Specifies the relationship between the parent table and the table.
1:n
In a 1:n (one-to-many) relationship, a record in the parent table may be associated with multiple records in the child table.
For example, each Customer can have several Customer Ledger Entries.
1:1
In a 1:1 (one-to-one) relationship, a record in the parent table may be associated with only one record in the child table.
For example, each Customer Ledger Entry is assigned to only one Customer.
First Record
Only outputs the first record that is found.
Last Record
Only outputs the last record that is found.
Output Condition
Specifies whether records in the parent table should only be output if records in the child table exist or do not exist.
Child records
Only outputs parent records if child records exist.
No child records
Only outputs parent records if there are no child records.
At least (n) child records
Only outputs parent records if there are a minimum number of child records. The minimum number n is specified in the Output Condition Value (n) field.
Not more than (n) child records
Only outputs parent records if a maximum number of child records exist. The maximum number n is specified in the Output Condition Value (n) field.
Note
If a parent table has several child tables with output conditions, the records are only output if all conditions are met.
If the current (child) table also has child tables with output conditions, these conditions are not taken into account for the output decision of the current parent table.
The position of an output condition in the tree structure is irrelevant. However, if several output conditions exist, they are processed according to their position.
Example
Only customers with current orders and at least two credit memos in the last 6 months should be listed.
The example can be downloaded in the Download Area (Example: Table Settings, Output Condition).
Output Condition Value (n)
Specifies the parameter for the output condition.
No Column Inheritance
Specifies whether the first record of the child table should also start with a new row.
Note
Individual columns can also be excluded from inheritance via the Field Settings of the parent table fields.
Example Customer 1:n Customer Ledger Entries with Column Inheritance
Example Customer 1:n Customer Ledger Entries without Column Inheritance
Start with New Row
Specifies whether the columns of the parent table should be empty after the child table starts a new row.
Note
Regardless of the setting, a new row is always started after running through a 1:n relation or in the case of a parallel tree structure.
Example Customer 1:n Customer Ledger Entries without new row
Example Customer 1:n Customer Ledger Entries with new row
Filters and Relations
In the Filters area you can specify filter criteria for the table and relations with parent tables. Only records that match the criteria are included in the evaluation. If you specify criteria for multiple fields, then only records that match all criteria will be displayed.
In case of a Relation the field value of the parent record is used as filter criterion. A operator in the filter determines how the filter should be set.
The Suggest Filters action can be used to suggest fields of the table and related fields between the table and the parent table. Existing filters will not be overwritten or changed.
Field
Specifies which field should be filtered.
If a field is specified here that is not hidden (Filter Type), a filter page is displayed later when the evaluation is executed.
You can also simply specify a field without a filter so that additional filters can be added to the table via the filter page when the evaluation is executed.
For more information, see Execute Evaluations, Evaluation Filters.
Related with
Specifies whether, and if so, to which field of a parent table the field of the table should be linked.
In the case of a relation, the value of the field of the parent record is used as the filter and a operator for the relation (Equal, Less, Greater, etc.) must be specified in the Filter field.
Click on the field to change or remove the relation.
Note
Tables can be linked to each other over several levels.
Theoretically, one and the same table can be superordinated to another table more than once. In this case, the record from the lowest or most immediate parent is used for the relation.
In the following example, when linking the detailed customer ledger entries to the customer, always the subordinated customer is used:
Filter
Specifies the filter for the field.
The possible or allowed values for the filter depend on the field:
If the field is related with a parent field, the operator ('=', '<=', '<', '>=', '>', '<>') for the relation must be specified in the filter.
The Filter values and operators can be selected via a lookup.
For date fields it is possible to specify [Variables] in date filters that will be calculated and replaced based on the Evaluation Date when the evaluation is executed.
For more information, see Edit Evaluations, Data Sheets, Date Filter Variables.
The filters of option fields (and yes/no fields) are stored in the current display language.
When executing the evaluation in another display language (or during a lookup of the filter), the filter is automatically converted.
If the field is related to the Salesperson/Purchaser table, the variable [USERSP] can be specified. When the evaluation is executed, the variable is replaced with the Code from the User Setup.
It is also possible to specify [Variables] in the filter, which are then replaced when the evaluation is executed.
The variables can be added to a filter via the Add Variable action. This opens a page that displays an overview of all available Filter Variables.
Note
A variable cannot be added to the filter if the field is related with a parent field.
Multiple variables can be specified in the filter.
The variables can be combined with Date Filter Variables.
The Filter Type must be Hidden if a variable is specified in the filter.
Specifies whether and how the filter can be changed when executing the evaluation.
Required
Required filters must be specified by the user.
Restricted
Restricted filters can only be further restricted by the user.
Locked
Locked filters cannot be changed by the user.
Hidden
Hidden filters are not displayed to the user.
Relations are always created as hidden filters, because here the value of the field of the parent record is used as a filter.
Tip
If you want to have the possibility to add additional filters to the table when executing the evaluation, but you want certain fields to be excluded from this, you can also specify these fields as Hidden.
Variable
Specifies a variable in which the specified filter is temporarily stored. The variable can then be specified in the filter of other lines to automatically set the same filter there.
A variable must begin with [ followed by a unique ID and end with ]. The brackets are added automatically when the variable is entered.
Note
The variables are not tied to a data sheet but cross data sheet.
A variable cannot be specified if the field is related with a parent field.
A variable cannot be specified for restricted filters.
User Filters
Specifies whether different filters for certain users are set for the field.
Click on the field to set up the filters.
FlowFilter - Table Filters vs. Field Filters
If FlowField fields are added to the table, FlowFilters set at the table level will affect the calculation of the fields.
Via the Field Settings FlowFilters can be set, which are only valid for the field.
Note
If a FlowFilter is set on table level and on field level, the FlowFilter on table level is ignored for the calculation of the field.
Docs / App / Excel Report Builder / Edit Evaluations / Data Sheets Date Filter Variables
It is possible to specify [Variables] in date filters that will be calculated and replaced based on the Evaluation Date when the evaluation executed.
Basically, the variables are date formulas. However, the English date formulas are always used, e.g.: D (Day).
The advantage over date formulas is that several date values (e.g. a date interval) can be specified combined in one filter.
As Evaluation Date the Work Date is suggested. The suggested date can be additionally modified via the Evaluation Date Formula of the evaluation.
Date Filter Variables can be used, for example, to set up evaluations where the date filter is automatically set to the current month when the evaluation is executed.
A variable must begin with [ and end with ].
A variable can be composed of the following IDs:
D Day
WD Weekday
W Week
M Month
Q Quarter
Y Year
C meaning 'current' and can be specified as a prefix to an ID
A list of date filter examples can be opened via the lookup of the date filter field.
Examples
The following table shows some examples of Date Filter Variable combinations and their results when the Work Date or the Evaluation Date is set to 06/30/2020.
Example
Result
Comment
[CD]
06/30/20
Evaluation Date
..[CD]
..06/30/20
Until Evaluation Date
01/01/20..[CD]
01/01/20..06/30/20
01/01/20 until Evaluation Date
..[-CM-1D]
..05/31/20
Until the end of last month (based on the Evaluation Date)
[-CM]..[CM]
06/01/20..06/30/20
Current Month
[-CM-1M]..[-CM-1D]
05/01/20..05/31/20
Last Month
[-CM-2M]..[-CM-1M-1D]
04/01/20..04/30/20
2 months ago
[-CM-3M]..[-CM-2M-1D]
03/01/20..03/31/20
3 months ago
[-CY]..[-CY+1M-1D]
01/01/20..01/31/20
January of the current year
[-CY+1M]..[-CY+2M-1D]
02/01/20..02/29/20
February of the current year
[-CY]..[CY]
01/01/20..12/31/20
Current Year
[-CY-1Y]..[CY-1Y]
01/01/19..12/31/19
Last Year
[-CY-2Y]..[CY-2Y]
01/01/18..12/31/18
2 years ago
[-CY-2Y]..[CY]
01/01/18..12/31/20
The last 3 years
[-CQ]..[CQ]
04/01/20..06/30/20
Current Quarter
[-CQ-1Q]..[-CQ-1D]
01/01/20..03/31/20
Last Quarter
[-CQ-2Q]..[-CQ-1Q-1D]
10/01/19..12/31/19
2 quarters ago
[-CY]..[-CY+1Q-1D]
01/01/20..03/31/20
The first quarter of the current year
[-CY+1Q]..[-CY+2Q-1D]
04/01/20..06/30/20
The second quarter of the current year
[-CY+2Q]..[-CY+3Q-1D]
07/01/20..09/30/20
The third quarter of the current year
[-CY+3Q]..[CY]
10/01/20..12/31/20
The fourth quarter of the current year
Docs / App / Excel Report Builder / Edit Evaluations / Data Sheets Field Settings
The Field Settings page is used to set up a field of a Data Sheet. Depending on the type of field, different settings are available or possible.
Fields
Field
Specifies for which field the settings are specified.
Click on the field to change or remove the field no. If the field no. is removed, the field becomes a formula field without a direct field reference.
Field Type
Displays information about the field.
Field Filters
Specifies whether FlowFilters that are valid only for the field are set for the field.
Field Filters can only be set for FlowFields. Click on the field to set up the filters.
Note
If a FlowFilter is set on table level and on field level, the FlowFilter on table level is ignored for the calculation of the field.
Tip
With field filters you can, for example, set up an evaluation in which the Sales (LCY) field of a Customer is displayed once for the current month and once for the last month.
The following example can be downloaded in the Download Area.
To set up the evaluation:
Add the Customer table to the Data Sheet.
Add the fields No., Name and Sales (LCY) to the Data Sheet.
Open the table settings of the Customer table and add the No. field as a filter.
Return to the Data Sheet.
Open the field settings of the Sales (LCY) field and enter '%1 Current Month' in the Name field.
Open the field filters of the field and enter 55 (Date Filter) in the Field No. field and '[-CM]..[CM]' in the Filter field.
Return to the Data Sheet.
Copy the line you just set up using the Add action, option: Copy current line.
Change the name of the copied line to '%1 Last Month'.
Change the field filter of the copied line to '[-CM-1M]..[-CM-1D]'.
Specifies a name for the field. If no name is specified, the default caption of the field is used.
Tip
It is possible to specify the placeholder %1 in the text, which is replaced by the default caption of the field.
For example, if the Sales (LCY) field of a a Customer is set up to show the total for the last month, you could specify '%1 Last Month' in the name.
The result would be 'Sales (LCY) Last Month'.
Add Table to Name
Specifies whether the name of the table should be added to the name of the field.
Internal Field
Specifies whether the field is used internally and should not be transferred to Excel.
If a [Variable] is assigned to the internal field, the value of the internal field can be accessed in subsequent fields via a formula.
To contain a value, internal fields must be specified before the formulas in which they are used.
For more information, see Edit Evaluations, Data Sheets, Formulas.
Variable
Specifies a variable that can be used to reference or access the field value in formulas.
A variable must begin with [ followed by a unique ID and end with ]. The brackets are added automatically when the variable is entered.
Formula
Formulas can be composed of Excel Functions, fixed and dynamic references, [Variables], constants and operators.
However, it is also possible to simply specify a text, which is then written to the Excel cells when the evaluation is executed.
If a calculation is to be performed in a formula, it begins with an equal sign.
Click on the field to set up the formula.
For more information, see Edit Evaluations, Data Sheets, Formulas.
Column Hidden
Specifies whether the column should be hidden.
Regardless of whether there are parallel tree structures and thus several specifications for a column in the sheet, a column is hidden if any of these columns is defined as hidden.
Font, Fields
Bold
Specifies whether the column should be bold.
Italic
Specifies whether the column should be italicized.
Fill Color
Specifies whether the background of the column should be colored and if so, with which color. If white (RGB 255,255,255 or HEX #FFFFFF) is selected, the background of the column will not be colored.
The selection can be canceled via the escape key.
Font Color
Specifies whether the text of the column should be colored and if so, with which color. If black (RGB 0,0,0 or HEX #000000) is selected, the text of the column will not be colored.
The selection can be canceled via the escape key.
Alignment, Fields
Horizontal Alignment
Specifies the horizontal alignment for the column.
Width (Characters)
Specifies the column width in Number of characters, based on the Calibri font in size 11.
If there are several parallel tree structures and thus several specifications for a column in the sheet, the largest value is used.
Wrap Text
Specifies whether extra-long text should be wrapped into multiple lines.
Formatting, Fields
Formatting
Specifies how the column should be formatted in Excel.
If the Automatic option is selected, the column in Excel is formatted as follows:
Yes/No fields (Boolean) are converted to Excel Functions =TRUE() or =FALSE().
Numbers (Decimal, Integer, BigInteger) are formatted as Number with/without comma.
Date fields are formatted as Date.
All other fields are formatted as Text.
Note
Unlike the Text option, Automatic saves the data in a standardized format in the workbook. This makes the data independent of the visualization and therefore also independent of language, region and country settings.
When a user opens the workbook, the data is automatically displayed in the format he or she has set.
If the Text option is selected, the data will be formatted depending on the settings in the Text Formatting field and the column in Excel will be formatted as Text.
Formulas are basically always formatted as standard regardless of the formatting setting.
Exceptions:
If the Format as Number field is set, the formula will be formatted as Number with/without comma.
If the Format as Date field is set, the formula will be formatted as Date.
However, when the placeholder [%1] is used in a formula, the text formatting affects the field value by which the placeholder is replaced.
For more information, see Edit Evaluations, Data Sheets, Formulas.
Text Formatting
Specifies whether a specific format should be used when formatting as text is selected.
Depending on the type of field, different formatting options are available. A lookup can be used to select from all the options that Business Central provides for the field. The formatting parameters can still be changed manually afterwards.
Specifies whether the formula or the result of the formula should be formatted in Excel as a number or as a date.
Decimal Places
Specifies the number of decimal places to display in Excel when automatic formatting is selected and the field is a decimal field, or when the formula is formatted as a number.
Without 1000 Separator
Specifies whether a thousands separator should be used or not.
DateTime Accuracy
Specifies whether only the minutes or also the seconds should be transferred to Excel if automatic formatting is selected and the field is a DateTime field.
Opposite Sign
Specifies whether the sign of the field value should be reversed.
Specifies whether a colored data bar should be added to the column to represent the value in a cell. The higher the value, the longer the bar.
Regardless of whether there are parallel tree structures and thus several specifications for a column in the sheet, a data bar is added if any of these columns is defined as a data bar.
Excel Table Total Row Type
Specifies what should be calculated for the field in the total row of an Excel Table if Excel Table is activated in the Sheet Settings of the Data Sheet.
If there are several parallel tree structures and thus several specifications for a column in the sheet, the first tree structure or the first occurrence determines the calculation.
Formulas can be composed of Excel Functions, fixed and dynamic references, [Variables], constants and operators. However, it is also possible to simply specify a text, which is then written to the Excel cells when the evaluation is executed.
Important
Note that in a Formula the English Excel Function names, commas instead of semicolons and dots as decimal separators must be used.
If there are problems with the content in a formula, Excel will alert you when opening the workbook.
Excel Formula / Excel Function
If the formula begins with an equal sign a calculation will be performed in Excel and the cell value is the result of an Excel Formula.
For example, a simple Excel Formula would be:
= 1 + 2 + 3
However, an Excel Formula can also be composed of References and Excel Functions such as:
= SUM(A1,B1) - 25 * MIN(C1:C6) + D1
Excel Functions can be added to a formula via the Add Excel Function action. This opens a page that displays an overview of all Excel Functions that have been set up.
For more information about formulas and functions, see:
https://support.microsoft.com/en-us/office/294d9486-b332-48ed-b489-abe7d0f9eda9
Fixed References
Examples of fixed references:
This formula
Refers to
And returns
=C2
Cell C2
the value in cell C2
=A1:F4
Cells A1 through F4
the values in all cells, but you must additionally set the Array Formula field
Instead of a fixed reference, a [Variable] can be specified, which is then replaced by the current value when the evaluation is executed.
Variables can be added to a formula via the Add Variable action. This opens a page that displays an overview of all available variables.
The following variables are available in each evaluation:
Variable
Will be replaced by
[%1]
the value of the current field
[TOTALVALUE]
Will be replaced by the sum of the field values of all records in the case of a numeric (Decimal, Integer, BigInteger) field.
These variables can be used, for example, to implement the old NC Cube field setting Count/Total.
Since the functionality is now available as a variable, new possibilities arise.
For example, if the Formula =100*[%1]/[TOTALVALUE] is specified for the Sales (LCY) field of the customer, the percentage value of the amount will be calculated.
[TOTALVALUE] is replaced by the total Sales (LCY) of all customers within the filters.
[%1] is replaced by the Sales (LCY) of the customer.
Tip
The totals are always calculated across all records within the filters. It does not matter how many records are actually output.
If, for example, you want to calculate the total(s) of certain customer entries for a customer, you can set the Relationship to First Record in the Table Settings of the customer entries.
This means that automatic line breaks can be avoided. The totals are still calculated across all customer entries.
[COL]
the current Excel column no.
[ROW]
the current Excel row no.
[USERID]
the current User ID
[COMPANY]
the current Company Name
[PERIOD_TEXT]
the current period (e.g. 2022/03 March) of a (parent) Date Loop
[PERIOD_DATE]
the current period (e.g. 03/01/22..03/31/22) of a (parent) Date Loop
[TOTALRECORDS]
the number of all records
[RECORDNO]
a sequential number for the current record
[RECORDID]
the RecordID of the current Record
Custom Variables
If a Variable is specified for a field, the variable can be used to reference or access the field value in formulas.
The [Variables] in the formulas are replaced by the current cell references of the fields when the evaluation is executed.
If a variable is assigned to the internal field, the value can be accessed in subsequent fields via a formula instead of the reference of the internal field.
Note
The row no. in the cell reference of a variable is reset to the current row no. after running through the 1:n relation or the tree structure in which the variable is defined.
To contain a value, internal fields must be specified before the formulas in which they are used.
The value of an internal field is reset after running through the 1:n relation or the tree structure in which the variable is defined.
Example 1
Note: This example is for explanation only and assumes a very simplified database in which only positive Customer Ledger Entries exist.
The example can be downloaded in the Download Area.
The following Data Sheet was created:
For each Customer Ledger Entry, the percentage of Balance (LCY) of the customer is calculated first.
For this purpose, the Balance (LCY) field was assigned the variable [B] and the Amount (LCY) field was assigned the variable [A].
The percentage value can thus be calculated in a Formula Field using the Formula =100/[B]*[A].
In addition, all entries are marked that are above a certain percentage value.
For this, the Percent Formula Field was assigned the variable [P].
In this example, the limit value is implemented via a text line before the data table.
The default value for the limit value is 50 percent. The variable [LP] was assigned to the Limit field.
The following result is displayed in Excel after executing the evaluation:
Tip
To display the formulas instead of the results in the cells in Excel, click on the Formulas tab in the menu bar and select the Show Formulas action in the Formula Auditing area.
The dynamic references were converted as follows:
[B] was replaced by the cell reference of the Balance (LCY) field.
[A] was replaced by the respective cell reference of the Amount (LCY) field.
[P] was replaced by the respective cell reference of the Percent formula field.
[LP] was replaced by the cell reference of the Limit field.
Example 2
For each field (except internal fields) for which a Variable has been specified, 2 additional variables are available.
For the Balance (LCY) field, for example, the following variables are also available:
[B:COL] will be replaced e.g. by the Excel column no. of the Balance (LCY) field.
[B:ROW] will be replaced e.g. by the Excel row no. of the Balance (LCY) field.
Based on example 1, the number of entries for the customer should now also be displayed.
The example can be downloaded in the Download Area.
Version 1:
Here the *:COL] variable is used.
The changes have been marked in the image.
In version 1, the Customer No. field is added to the entries.
Using the formula =COUNTIF([PNO:COL]:[PNO:COL],[NO]) all rows are counted where the column with the variable [PNO] contains the value of the variable [NO] and thus the No. of the customer.
Version 2:
It is not always possible to find a simple criterion for the query.
It could also be that the criterion is repeated in subsequent lines.
Version 2 shows an alternative solution.
The *:COL], *:ROW] and [ROW] variables are used for this.
The changes have been marked in the image.
In this version a Formula Field Customer RowID is added to the entries.
The field is filled via a Formula with the row no. of the Number of Entries field and thus with the row no. of the customer record. Thus, each entry has a unique criterion for the query.
Using the formula =COUNTIF([RID:COL]:[RID:COL],[ROW]) all rows are counted where the column with the variable [RID] contains the value of the row no. of the customer record.
Formula Help
The Formula Help action displays an overview of all Excel Functions and [Variables] used in the current formula. This overview can be used, for example, to call up the help for the Excel Functions used. In addition, you can also see what replaces the variables when the evaluation is executed.
Translate
Note that in a Formula the English Excel Function names, commas instead of semicolons and dots as decimal separators must be used. If required, the Excel Function names of the Formula can be translated into English Excel Function names with this action.
Additional Settings
Format Formula as
Specifies whether the formula or the result of the formula should be formatted in Excel as a number or as a date.
Decimal Places
Specifies the number of decimal places to display in Excel when the formula is formatted as a number.
Without 1000 Separator
Specifies whether a thousands separator should be used or not.
When the workbook is opened, Excel checks the formulas.
If a problem is detected, e.g. if a formula was specified incorrectly, the following message appears:
We found a problem with some content in '...xlsx'. Do you want us to try to recover as much as we can?
Click Yes to get more information and check the workbook.
Docs / App / Excel Report Builder / Edit Evaluations / Data Sheets Text Settings
The Text Settings page is used to set up a text line of a Data Sheet.
Fields
Name
Specifies a name for the field.
If no name is specified, the formula is written in the first column.
If neither a name nor a formula is specified, a blank line is created.
Variable
Specifies a variable that can be used to reference or access the field value in formulas.
A variable must begin with [ followed by a unique ID and end with ]. The brackets are added automatically when the variable is entered.
Formula/Text
Formulas can be composed of Excel Functions, fixed and dynamic references, [Variables], constants and operators. However, it is also possible to simply specify a text, which is then written to the Excel cells when the evaluation is executed.
If a calculation is to be performed in a formula, it begins with an equal sign.
Click on the field to set up the formula.
For more information, see Edit Evaluations, Data Sheets, Formulas.
Font, Fields
Bold
Specifies whether the column should be bold.
Italic
Specifies whether the column should be italicized.
Fill Color
Specifies whether the background of the column should be colored and if so, with which color. If white (RGB 255,255,255 or HEX #FFFFFF) is selected, the background of the column will not be colored.
The selection can be canceled via the escape key.
Font Color
Specifies whether the text of the column should be colored and if so, with which color. If black (RGB 0,0,0 or HEX #000000) is selected, the text of the column will not be colored.
The selection can be canceled via the escape key.
Alignment, Fields
Horizontal Alignment
Specifies the horizontal alignment for the column.
Width (Characters)
Specifies the column width in Number of characters, based on the Calibri font in size 11.
If there are several text lines or parallel tree structures and thus several specifications for a column in the sheet, the largest value is used.
Wrap Text
Specifies whether extra-long text should be wrapped into multiple lines.
Formatting, Fields
Format Formula as
Specifies whether the formula or the result of the formula should be formatted in Excel as a number or as a date.
Decimal Places
Specifies the number of decimal places to display in Excel when the formula is formatted as a number.
Without 1000 Separator
Specifies whether a thousands separator should be used or not.
The PivotTable page is used to set up the general settings of the PivotTable and the fields of the PivotTable.
In order for a PivotTable to be created, it must first be specified for which Data Sheet it is to be created. After that, the fields for the PivotTable can be selected.
The general settings of the PivotTable Sheet can be set up via the Sheet Settings action.
For more information, see Edit Evaluations, PivotTable Sheets, Sheet Settings.
Fields
Data Sheet
Specifies for which Data Sheet the PivotTable should be created.
Undefined is displayed if no Data Sheet is specified yet.
Unknown is displayed if a Data Sheet is specified that no longer exists.
Note
A PivotTable must always be connected with a Data Sheet.
If no Data Sheet is specified, the PivotTable is not taken into account or not created when the evaluation is executed.
Sheet Name
Specifies a name for the sheet. If no name is specified, the type of the sheet is used. Additionally, it is possible to specify placeholders in the text. The placeholder %1 will be replaced by the type of the sheet. The placeholder %2 will be replaced by the name of the data sheet.
Data Sheet Fields
Once a Data Sheet is specified, the tables and fields from the Data Sheet are displayed here.
Actions
Data Sheet Fields can be added to the PivotTable via the Add action or by clicking on the field.
Note
Text lines and internal fields cannot be added to a PivotTable and are therefore not displayed.
Fields from a parallel tree structure cannot be added to a PivotTable directly but only indirectly via the first tree structure.
Parallel tree structures are displayed red + italic for guidance.
The Sheet Settings page is used to set up the general settings of the PivotTable Sheet.
Fields
Sheet Name
Specifies a name for the sheet. If no name is specified, the type of the sheet is used. Additionally, it is possible to specify placeholders in the text. The placeholder %1 will be replaced by the type of the sheet. The placeholder %2 will be replaced by the name of the data sheet.
Layout, Fields
Classic PivotTable Layout
Specifies whether the PivotTable should be created in Classic Layout by default. The Classic Layout enables dragging of fields in the grid.
The default setting for the field can be set in the Excel Evaluation Setup.
Grand Totals
Specifies whether to display the grand totals next to the last column resp. at the bottom of the PivotTable.
The grand total for rows is displayed next to the last column:
The grand total for columns is displayed at the bottom of the PivotTable:
Style, Fields
PivotTable Style
Specifies a style for the PivotTable. If the field is empty, the default setting from the Excel Evaluation Setup will be used.
Row Headers
Specifies whether to display special formatting for the first row of the PivotTable.
Column Headers
Specifies whether to display special formatting for the first column of the PivotTable.
Banded Rows
Specifies whether to display banded rows, in which even columns are formatted differently from odd rows.
Banded Columns
Specifies whether to display banded columns, in which even columns are formatted differently from odd columns.
Chart, Fields
Chart
Specifies whether a chart should be created for the PivotTable. The chart will be created in a separate sheet.
Chart Sheet Name
Specifies a name for the chart sheet. If no name is specified, the type of the sheet is used. Additionally, it is possible to specify placeholders in the text. The placeholder %1 will be replaced by the type of the sheet. The placeholder %2 will be replaced by the name of the data sheet.
Chart Title
Specifies a title for the chart. A title will only be added to the chart if the field contains a value.
Chart Type
Specifies the chart type.
Print, Fields
Orientation
Specifies the default print format for the worksheet.
Fit width to pages
Specifies whether the size of the worksheet should be adjusted to fit on the specified number of pages.
Rows to repeat at top
Specifies a range to be printed on each page. For example, you can specify '$1:$1' for the first row of the worksheet.
Columns to repeat at left
Specifies a range to be printed on each page. For example, you can specify '$A:$B' for the first two columns of the worksheet.
Page Order
Specifies the sequence in which the worksheet data is numbered and printed if it does not fit on one page.
The PivotTable Field Settings page is used to set up a field of a PivotTable.
Depending on the type of PivotTable field, different field settings are available.
Sort, Fields
Sort by
Specifies whether the data should be sorted by a particular field.
Sort
Specifies whether the data should be sorted in ascending or descending order.
Label Filter, Fields
Filter
Specifies the type of filter.
Filter Value, Filter Value 2
Specifies the parameters of the filter.
Value Filter, Fields
Filter by
Specifies whether the data should be filtered by a particular field.
Filter
Specifies the type of filter.
Filter Value, Filter Value 2
Specifies the parameters of the filter.
Subtotals, Fields
Subtotals
Specifies whether subtotals should be calculated.
Custom Subtotals
Displays the settings of the custom Subtotals. Click on the field to view or edit the settings.
Sum specifies whether the the sum of the values should be calculated. This is the default function for numeric data.
Count specifies whether the the number of data values should be calculated. Count is the default function for data other than numbers.
Average specifies whether the average of the values should be calculated.
Max specifies whether the largest value should be calculated.
Min specifies whether the smallest value should be calculated.
Product specifies whether the product of the values should be calculated.
Count Numbers specifies whether the number of data values that are numbers, should be calculated.
StdDev specifies whether an estimate of the standard deviation of a population, where the sample is a subset of the entire population, should be calculated.
StdDevP specifies whether the standard deviation of a population, where the population is all of the data to be summarized, should be calculated.
Var specifies whether an estimate of the variance of a population, where the sample is a subset of the entire population, should be calculated.
VarP specifies whether the variance of a population, where the population is all of the data to be summarized, should be calculated.
Layout, Fields
Form
Specifies how the field should be displayed when used as a Row Label.
Note
The setting is ignored for classic PivotTable layouts.
The Compact Form displays items from different row area fields in one column.
Indents are used to clarify the difference between items from different fields. Row labels take up less space in compact form, which leaves more room for numeric data. Expand and Collapse buttons are displayed so that you can display or hide details in compact form. The Compact form saves space and makes the PivotTable more readable and is therefore specified as the default layout form for PivotTables.
The Tabular Form displays one column per field and provides space for field headers.
The Outline Form is similar to Tabular Form but it can display subtotals at the top of every group because items in the next column are displayed one row below the current item.
Subtotals at the top of each group
Specifies whether to display the subtotals in the Compact Form and Outline Form above or below the subtotaled rows.
Repeat item labels
Specifies whether to repeat the item and field labels in a PivotTable to visually group the rows or columns together. Repeated labels are shown only when the PivotTable is in Tabular Form.
For example, use repeating labels when subtotals are turned off or there are multiple fields for items. In the example shown below, the regions are repeated for each row and the product is repeated for each column.
Blank line after each item label
Specifies whether a blank line should be inserted after each item.
Print, Fields
Page break after each item
Specifies whether a page break should be inserted after each item.
Specifies a style for the Slicer.
If the field is empty, the default setting from the Excel Evaluation Setup will be used.
Left Position (cm)
Specifies the position of the slicer.
If no value is specified, the position is calculated from the position + width of the previous slicer.
Top Position (cm)
Specifies the position of the slicer.
If no value is specified, the value of the previous slicer is used.
Number of Columns
Specifies the number of columns in the slicer.
Button Height (cm)
Specifies the height of the slicer buttons.
Size
Height (cm)
Specifies the height of the slicer.
If no value is specified, the value of the previous slicer is used.
Width (cm)
Specifies the width of the slicer.
If no value is specified, the value of the previous slicer is used.
Docs / App / Excel Report Builder / Edit Evaluations / Other Sheets Text Sheet
Via Text Sheets, sheets with text can be added to the Excel workbook.
Text sheets can also be used to specify shared parameters, which can then be used for calculations in different sheets of the workbook. In this case, the text sheets or their parameter values must be accessed from the other sheets via sheet references.
The Text Sheet page is used to set up the sheet.
Fields
Text
Specifies the text.
Offset Type
Specifies whether the text should start a new row or a new column.
Offset
Specifies a value to be added in addition to the row/column offset.
Bold
Specifies whether the text should be bold.
Italic
Specifies whether the text should be italicized.
Horizontal Alignment
Specifies the horizontal alignment for the text.
Width (Characters)
Specifies the column width in Number of characters, based on the Calibri font in size 11.
If there are several specifications for a column, the largest value is used.
Wrap Text
Specifies whether extra-long text should be wrapped into multiple lines.
Actions
Up / Down
The position or the order of the selected text lines can be changed with Up and Down.
The Sheet Settings page is used to set up the general settings of the Text Sheet.
Fields
Sheet Name
Specifies a name for the sheet.
If no name is specified, the type of the sheet is used.
It is additionally possible to specify the placeholder %1 in the text, which is replaced by the type of the sheet.
Print, Fields
Orientation
Specifies the default print format for the worksheet.
Fit width to pages
Specifies whether the size of the worksheet should be adjusted to fit on the specified number of pages.
Rows to repeat at top
Specifies a range to be printed on each page. For example, you can specify '$1:$1' for the first row of the worksheet.
Columns to repeat at left
Specifies a range to be printed on each page. For example, you can specify '$A:$B' for the first two columns of the worksheet.
Page Order
Specifies the sequence in which the worksheet data is numbered and printed if it does not fit on one page.
Docs / App / Excel Report Builder / Edit Evaluations / Other Sheets Information Sheet
Via the Information Sheet, a sheet with information about the evaluation can be added to the Excel workbook.
Only one information sheet can be added per evaluation.
Fixed Information
The following evaluation data is always added on an information sheet:
Description of the evaluation
Code of the evaluation
Date/Time
The Information Sheet page is used to set up the sheet.
Fields
Sheet Name
Specifies a name for the sheet.
If no name is specified, the type of the sheet is used.
It is additionally possible to specify the placeholder %1 in the text, which is replaced by the type of the sheet.
Add Filters
Specifies whether the filters of the evaluation should be added to the Information Sheet.
Add Comments
Specifies whether the comments of the evaluation should be added to the Information Sheet.
Print, Fields
Orientation
Specifies the default print format for the worksheet.
Fit width to pages
Specifies whether the size of the worksheet should be adjusted to fit on the specified number of pages.
Rows to repeat at top
Specifies a range to be printed on each page. For example, you can specify '$1:$1' for the first row of the worksheet.
Columns to repeat at left
Specifies a range to be printed on each page. For example, you can specify '$A:$B' for the first two columns of the worksheet.
Page Order
Specifies the sequence in which the worksheet data is numbered and printed if it does not fit on one page.
The User Permission field on the evaluation card specifies whether the evaluation may be executed only by the user responsible for the evaluation, by all users, or only by a restricted group of users.
Note
Regardless of the selected option, the following always applies:
In order for a user to execute an evaluation, they must be authorized to read the data (tables) to be evaluated.
The User Permissions are checked when executing an evaluation and when opening an archived evaluation.
All Users
Basically, with this setting, any user may execute the evaluation.
Restricted Group
With this setting, the evaluation may only be executed by selected users.
The Restricted Group field on the evaluation card shows the number of users who are allowed to execute the evaluation.
Click on the field to manage the permissions.
The No. of Subscribers field on the evaluation card shows the number of users who have added the evaluation to their My Excel Evaluations list.
For more information, see Execute Evaluations, My Excel Evaluations.
Click on the field to manage or change the assignments.
Basically, users can add an evaluation to their My Excel Evaluations list by themselves if they are allowed to execute the evaluation.
However, it is also possible to add an evaluation to the My Excel Evaluations list of certain users via the No. of Subscribers field.
Note
User assignment has no influence on whether a user is allowed to execute an evaluation or not.
The permissions for execution are only set via the User Permissions.
For more information, see Edit Evaluations, Extended, User Permissions.
If the user permissions are changed, the evaluation may be assigned to users who no longer have permission to execute the evaluation.
The No. of Email Recipients field on the evaluation card shows the number of recipients to be suggested in the email when using the Send by Email action.
For more information, see Execute Evaluations, Send Excel Evaluation by Email.
Click on the field to manage or change the recipients.
Tip
It is possible to specify the variable [USEREMAIL] in the Email field, which is replaced by the email address of the user executing the evaluation.
Specifies whether an evaluation with the code already exists.
An additional confirmation is necessary for replacing an evaluation.
Keep User Permissions
Specifies whether existing User Permissions of an evaluation should be retained when replacing an evaluation.
Keep Subscribers
Specifies whether existing Subscribers of an evaluation should be retained when replacing an evaluation.
Keep Email Recipients
Specifies whether existing Email Recipients of an evaluation should be retained when replacing an evaluation.
Copy to Companies
Via this action, the evaluation can be copied to other companies.
Copy from
Code
Specifies the code of the existing evaluation to copy from.
Description
Specifies the description of the existing evaluation.
Note
User Permissions, Subscribers, User Filters and Email Recipients are not copied.
Copy to
No. of Companies
Specifies the number of companies to which the evaluation is to be copied. Click on the field to add or remove companies.
Ignore Change Protection
Specifies whether the evaluation should also be copied to companies where the change protection is activated for the evaluation.
Keep User Permissions
Specifies whether existing User Permissions of an evaluation should be retained when replacing an evaluation.
The option is fixed and cannot be changed.
For more information, see Edit Evaluations, Extended, User Permissions.
Keep Subscribers
Specifies whether existing Subscribers of an evaluation should be retained when replacing an evaluation.
The option is fixed and cannot be changed.
For more information, see Edit Evaluations, Extended, Subscribers.
Keep Email Recipients
Specifies whether existing Email Recipients of an evaluation should be retained when replacing an evaluation.
The option is fixed and cannot be changed.
For more information, see Edit Evaluations, Extended, Email Recipients.
Export
This action can be used to export an evaluation to a file or multiple selected evaluations to a zip file.
Export from
Code
Specifies the code of the evaluation to be exported.
Description
Specifies the description of the evaluation to be exported.
Selected Evaluations
Specifies the number of selected evaluations.
The field is only displayed when evaluations are exported to a zip file.
Excel Report Builder files have the file extension .nce.
NCE stands for NAVAX Consulting Excel Report Builder.
Export without Code
Specifies whether the evaluation should be exported without code.
If the code is not exported, a code for the evaluation must be specified when the file is imported later.
Import
This action can be used to import an evaluation from a file or multiple evaluations from a zip file.
It is also possible to import old NC Cube files.
For more information, see Appendix, Import old NC Cube files.
Import from
Progress
Shows the progress when importing from a zip file.
The field is only displayed when evaluations are imported from a zip file.
Description
Specifies the description of the evaluation to be imported.
Specifies whether all evaluations for which a code is specified should be automatically imported with that code if no evaluation with that code yet exists.
The field is only displayed when evaluations are imported from a zip file.
Code
Specifies the code for the new evaluation.
Code already Exists
Specifies whether an evaluation with the code already exists.
An additional confirmation is necessary for replacing an evaluation.
Keep User Permissions
Specifies whether existing User Permissions of an evaluation should be retained when replacing an evaluation.
Keep Subscribers
Specifies whether existing Subscribers of an evaluation should be retained when replacing an evaluation.
Keep Email Recipients
Specifies whether existing Email Recipients of an evaluation should be retained when replacing an evaluation.
Docs / App / Excel Report Builder / Edit Evaluations / Tips & Tricks Get month name from date
If you want to determine the month name from a date field, it is best to use Text Formatting in the Field Settings of the date field.
If you use the month field in a PivotTable as a column label, the sorting depends on the sorting of the records in the data sheet by default. This may produce the following result:
This can be prevented by specifying the sorting for the column name:
This produces the following result:
The example can be downloaded in the Download Area.
Docs / App / Excel Report Builder / Edit Evaluations / Tips & Tricks Get data via sheet reference
Example
A list of all customer bank accounts and their IBAN country names should be created.
So first add a data sheet with the Customer Bank Account table and the IBAN field.
Then set the Text Formatting in the Field Settings of the IBAN field:
The text formatting causes only the first two digits of the IBAN to be displayed.
In addition, the field has been assigned the Variable [CC]. Optionally, a descriptive name can also be assigned.
After that, another data sheet with the Country/Region table must be added to the evaluation.
This data sheet contains all country codes and their names. CCNames was given as the Sheet Name.
The country name for the IBAN can now be determined in the Customer Bank Account data sheet using a formula:
The example can be downloaded in the Download Area.
In the My Excel Report Builder Evaluations page you can arrange and manage your personal list of Excel Evaluations that you are allowed to execute.
In the Accountant role and in the Accounting Manager role, the list is also integrated as a Role Center list.
For more information, see General, Role Center Integration.
Evaluations can be added to the list via the Add action.
Fields
Evaluation Code
Specifies the code of the evaluation.
Description
Specifies the description of the evaluation.
Comments
Displays the first comment line if there are comments for the evaluation. Click on the field to view all comments.
Executes the evaluation, saves the Excel workbook in your Business Central folder in OneDrive and opens it in a new window so you can manage or share the file.
The action is only available if OneDrive is available.
For more information, see Execute Evaluations, Execute Excel Evaluation.
Share
Executes the evaluation, saves the Excel workbook in your Business Central folder in OneDrive and shares the file. You can also see who it's already shared with.
The action is only available if OneDrive is available.
For more information, see Execute Evaluations, Execute Excel Evaluation.
Inserts selected evaluations after the current position.
The evaluation can be selected via a page that displays all Excel Evaluations that you are allowed to execute and that are not yet included in your list.
Up / Down
The position or the order of the selected evaluations can be changed with Up and Down.
As soon as the Excel workbook has been created, a message appears in the Report Inbox.
The Excel workbook can then be opened directly via the Report Inbox.
Options
Evaluation Code
Specifies the code of the evaluation to be executed.
Description
Specifies the description of the evaluation to be executed.
Comments
Displays the first comment line if there are comments for the evaluation.
Preview with sample data
Specifies whether to execute the evaluation with randomly generated sample data as a kind of preview to check the current settings. The file name of the workbook is prefixed with SampleData_.
This option is only available if the evaluation is being edited and is executed via a sheet (e.g. data sheet).
Note
Filters and relations between the tables are not considered or are not correct in terms of data. For example, if a Customer has a 1:n relation with the Customer Ledger Entries and the fields No. of the Customer and Customer No. of the Entries are specified as columns, the contents of the fields will differ.
OneDrive Integration
If a connection between Business Central and OneDrive exists, the actions Open in OneDrive and Share are additionally available.
An evaluation can be executed via these actions and saved in your Business Central folder in OneDrive. The evaluation will then be opened in a new window or shared.
If you do not want to use the two actions for the evaluations, you can also disable the OneDrive Integration in the Excel Report Builder Setup.
For more information about Business Central and OneDrive for Business Integration, see:
https://learn.microsoft.com/en-us/dynamics365/business-central/across-onedrive-overview
In the Excel Evaluation Filters page you can specify the filters for the execution of the evaluation.
Note
Whether the page is displayed depends on the filter settings of the Data Sheets of an evaluation.
The page is displayed when executing or archiving the evaluation.
If Execute or Archive is scheduled, no page is displayed.
Fields
Evaluation Date
Specifies the date for calculating the date filter variables.
The field is displayed only if the current evaluation supports the calculation of date filters based on a Date.
If you change the date, the date filters will be recalculated.
Field
Displays information about the field that should be filtered.
Additional fields can be added via 🞤 Filter...
Filter
Specifies the filter for the field. The possible or allowed values for the filter depend on the field.
The filter values can be selected via a lookup.
Filter Type
Specifies whether the filter must be specified, the available records are prefiltered or restricted or the filter is locked and thus cannot be changed.
Docs / App / Excel Report Builder / Execute Evaluations Analyze Data in Excel
Analyze Data in Excel empowers you to understand your data through natural language queries that allow you to ask questions about your data without having to write complicated formulas. In addition, Analyze Data provides high-level visual summaries, trends, and patterns.
For more information, see https://support.microsoft.com/en-us/office/3223aab8-f543-4fda-85ed-76bb0295ffc4
Specifies the code of the evaluation to be executed.
Description
Specifies the description of the evaluation to be executed.
Comments
Displays the first comment line if there are comments for the evaluation.
Send email
Once the Excel workbook has been created, the page for sending the email opens, displaying the default values from the evaluation. The generated Excel file is automatically added as an attachment.
Note
If the action was performed as a scheduled task, the email will be sent automatically in the background.
As soon as archiving has been performed, a message appears in the Report Inbox.
The archived evaluation can then be opened directly via the Report Inbox or via the Evaluation Archive.
For more information, see Execute Evaluations, Evaluation Archive.
Options
Evaluation Code
Specifies the code of the evaluation to be archived.
Description
Specifies the description of the evaluation to be archived.
Comments
Displays the first comment line if there are comments for the evaluation.
Archive Comment
Specifies a comment for the archived evaluation.
For all Users
Specifies if the archived evaluation should be visible to all users who have added the evaluation to their My Excel Evaluations list.
Create Notifications
Specifies whether the users should be notified via a message in their Report Inbox when the archiving has been performed.
The following applies:
Users will receive a notification regardless of whether the action is scheduled or not.
The user performing the action will only receive a notification if the action is scheduled.
The Excel Evaluation Archive page shows an overview of all archive entries of the evaluation and can be accessed directly via the evaluation, or via My Excel Evaluations.
If the page is opened via My Excel Evaluations, only your own entries and entries visible to all users are displayed.
For more information, see Execute Evaluations, Archive Excel Evaluation.
Fields
Archive No.
Specifies the number assigned to the archived evaluation.
Date Archived
Specifies the date when the evaluation was archived.
Time Archived
Specifies what time the evaluation was archived.
Archived By
Specifies the user ID of the person who archived this evaluation.
For all Users
Specifies if the line is visible to all users who have added the evaluation to their My Excel Evaluations list.
Archive Comment
Specifies a comment for the archived evaluation.
Actions
Open
Opens the archived Excel workbook. This creates an Excel workbook on your device.
Open in OneDrive
Saves the archived Excel workbook in your Business Central folder in OneDrive and opens it in a new window so you can manage or share the file.
The action is only available if OneDrive is available.
Share
Saves the archived Excel workbook in your Business Central folder in OneDrive and shares the file. You can also see who it's already shared with.
The action is only available if OneDrive is available.
Send by Email
Prepares to send the archived Excel workbook by Email.
Docs / App / Excel Report Builder / Information for Developers Runnable Codeunits
On the Excel Evaluation Card page, a Codeunit for the evaluation can be specified in the Codeunit to Run field. This can be used, for example, to display notes or to recalculate or update data directly before the evaluation is executed.
Edit Evaluations, General, Edit Excel Evaluation
In order to ensure that only Codeunits can be executed that were also created for the Excel Report Builder, they must be additionally included or unlocked via an EventSubscriber.
The Excel Report Builder calls the Codeunit for an evaluation via the OnRun() trigger of the Codeunit.
Additional information for the user and the Call Location of the Codeunit is specified via the EventSubscriber.
Possible Call Locations
OnShowExecutePage
When the execute page is displayed.
This position is particularly suitable for displaying users general information about the evaluation.
Example:
OnShowFilterPage
When the filter page is displayed.
Similar to OnShowExecutePage only directly after the execute page. The call is made even if no filter page is displayed.
OnBeforeExecute
Before the evaluation is executed.
This position is particularly suitable for displaying a confirmation and/or for recalculating/updating data.
Example 1
As a simple example, you can specify the Codeunit 70171837 "NCE Show Schedule Message" in an evaluation.
This Codeunit is delivered with the Excel Report Builder and causes the following additional message to be displayed when the evaluation is executed:
Implementation
The Codeunit is structured as follows and can be used as a template for your own requirements:
codeunit 70171837 "NCE Show Schedule Message"
{
    trigger OnRun()
    begin
        if (CurrentClientType = ClientType::Background) then
            exit;
        Message(ScheduleMsg);
    end;

    var
        ScheduleMsg: Label 'This evaluation should be scheduled.\As soon as the Excel workbook has been created, a message appears in the Report Inbox.', Comment = 'DEU="Diese Auswertung sollte als Plan ausgeführt werden.\Sobald die Excel-Arbeitsmappe erstellt wurde, erscheint eine Meldung im Berichtseingang."';

    [EventSubscriber(ObjectType::Codeunit, Codeunit::"NCE Runnable Codeunit Mgt.", 'OnAddAllowedCodeunitsToRun', '', false, false)]
    local procedure NCERunnableCodeunitMgt_OnAddAllowedCodeunitsToRun(var TempNCERunnableCodeunit: Record "NCE Runnable Codeunit" temporary)
    var
        HelpTxt: Label 'This Codeunit causes the following additional message to be displayed when the evaluation is executed:\\', Comment = 'DEU="Diese Codeunit bewirkt, dass beim Ausführen der Auswertung zusätzliche folgende Meldung angezeigt wird:\\"';
    begin
        TempNCERunnableCodeunit.Add(Codeunit::"NCE Show Schedule Message", HelpTxt + '"' + ScheduleMsg + '"', "NCE Codeunit Call Location"::OnShowExecutePage);
    end;
}
Via TempNCERunnableCodeunit.Add the Codeunit will be included or unlocked in the Excel Report Builder.
Parameter
CodeunitID
Important
The first parameter CodeunitID determines which Codeunit it is.
TempNCERunnableCodeunit.Add(Codeunit::"NCE Show Schedule Message", ...
The value must match the name of the Codeunit.
CodeunitHelpText
This text is displayed when selecting the Codeunit to Run in the Excel Evaluation Card.
Information about the purpose and usage of the Codeunit should be provided here.
CodeunitCallLocation
Determines where the Codeunit is called.
Example 2
Another simple example is the Codeunit 70171836 "NCE Confirm Long Run Time".
This Codeunit is also delivered with the Excel Report Builder and causes the following additional confirmation to be displayed when the evaluation is executed:
Implementation
The Codeunit is structured as follows and can be used as a template for your own requirements:
codeunit 70171836 "NCE Confirm Long Run Time"
{
    trigger OnRun()
    var
        ConfirmManagement: Codeunit "Confirm Management";
    begin
        if (CurrentClientType = ClientType::Background) then
            exit;
        if not ConfirmManagement.GetResponseOrDefault(LongRuntimeMsg, true) then
            Error('');
    end;

    var
        LongRuntimeMsg: Label 'It will take a longer time to execute this evaluation.\Do you want to execute the evaluation anyway?', Comment = 'DEU="Das Ausführen dieser Auswertung wird länger dauern.\Möchten Sie die Auswertung trotzdem ausführen?"';

    [EventSubscriber(ObjectType::Codeunit, Codeunit::"NCE Runnable Codeunit Mgt.", 'OnAddAllowedCodeunitsToRun', '', false, false)]
    local procedure NCERunnableCodeunitMgt_OnAddAllowedCodeunitsToRun(var TempNCERunnableCodeunit: Record "NCE Runnable Codeunit" temporary)
    var
        HelpTxt: Label 'This Codeunit causes the following additional confirmation to be displayed when the evaluation is executed:\\', Comment = 'DEU="Diese Codeunit bewirkt, dass beim Ausführen der Auswertung zusätzliche folgende Bestätigung angezeigt wird:\\"';
    begin
        TempNCERunnableCodeunit.Add(Codeunit::"NCE Confirm Long Run Time", HelpTxt + '"' + LongRuntimeMsg + '"', "NCE Codeunit Call Location"::OnBeforeExecute);
    end;
}
Docs / App / Excel Report Builder / Information for Developers Temporary Data Codeunits
Temporary Data Codeunit
With the help of temporary data codeunits, evaluations can be extended with functions that temporarily calculate certain data of the evaluation during execution.
This makes it possible, for example, to evaluate data that is normally not available or not available in this form.
Temporary Data Codeunits can be provided or added via custom programming.
These codeunits can then be added to a Datasheet via the Add, More Options... action.
Edit Evaluations, Data Sheets, Data Sheet
Structure
Temporary data codeunits consist of the codeunit for the calculation and a table of TableType = Temporary for the result.
Note
Even if a table is not defined as temporary, the table is transferred as a temporary table when the codeunit is called. You could therefore also use existing tables for temporary calculations. However, it is recommended to create a separate table.
In order for the Excel Report Builder to recognize the codeunit as a temporary data codeunit, it must be integrated via an EventSubscriber.
The EventSubscriber can also be used to specify help texts, which are later displayed in an evaluation when the codeunit is selected.
Example 1
A total is to be calculated for all countries within the filter.
It should be possible to specify the country/region code as a filter.
As a result, the total of Sales (LCY) and the number of posted invoices should be returned as a single record.
Implementation
The table for the result is structured as follows:
The codeunit for the calculation is structured as follows:
codeunit 50000 "NVX Country Statistics"
{
    TableNo = "NVX Country Statistics";

    trigger OnRun()
    var
        NVXCountryStatistics: Record "NVX Country Statistics";
        Customer: Record Customer;
    begin
        if not Rec.IsTemporary() then
            exit;

        //In this example, the total is determined via the customers.
        //Any country/region filters that have been set must therefore be transferred from the temporary table to the customers.
        //The filter on the temporary table is then removed in this example, as the field is only used for filtering the customers.
        Customer.SetCurrentKey("Country/Region Code");
        Rec.FilterGroup(0);
        Customer.FilterGroup(0);
        Rec.CopyFilter("Country/Region Filter", Customer."Country/Region Code");
        Rec.SetRange("Country/Region Filter");
        Rec.FilterGroup(2);
        Customer.FilterGroup(2);
        Rec.CopyFilter("Country/Region Filter", Customer."Country/Region Code");
        Rec.SetRange("Country/Region Filter");
        //set relation filter
        //The Excel Report Builder transfers filters from relations via filter group 11
        Rec.FilterGroup(11);
        Customer.FilterGroup(11);
        Rec.CopyFilter("Country/Region Filter", Customer."Country/Region Code");
        Rec.SetRange("Country/Region Filter");
        Rec.FilterGroup(0);
        Customer.FilterGroup(0);

        NVXCountryStatistics.Copy(Rec);

        Clear(Rec);
        Rec."Country/Region Filter" := '';
        Rec.Insert();
        if Customer.FindSet() then
            repeat
                Customer.CalcFields("Sales (LCY)", "No. of Pstd. Invoices");
                Rec."Sales (LCY)" += Customer."Sales (LCY)";
                Rec."No. of Pstd. Invoices" += Customer."No. of Pstd. Invoices";
                Rec.Modify();
            until Customer.Next() = 0;

        Rec.Copy(NVXCountryStatistics);
    end;

    [EventSubscriber(ObjectType::Codeunit, Codeunit::"NCE Temp. Data Codeunit Mgt.", 'OnAddAllowedTempDataCodeunits', '', false, false)]
    local procedure NCETempDataCodeunitMgt_OnAddAllowedTempDataCodeunits(var TempNCETempDataCodeunit: Record "NCE Temp. Data Codeunit" temporary)
    var
        NVXCountryStatistics: Record "NVX Country Statistics";
        CountryRegion: Record "Country/Region";
        RecField: Record Field;
        CodeunitID: Integer;
        TableID: Integer;
        TableSettingsName: Text;
        HelpTxt: Label 'This Codeunit calculates the total for all countries within the filter.';
        FiltersAndRelationsHelpTxt: Label '\\Filters and Relations:\The filter in the ''%1'' field determines which Countries/Regions should be included in the evaluation.';
        ResultsHelpTxt: Label '\\Results:\''%1'', ''%2''';
    begin
        CodeunitID := Codeunit::"NVX Country Statistics";
        TableID := Database::"NVX Country Statistics";
        TableSettingsName := NVXCountryStatistics.TableCaption();

        TempNCETempDataCodeunit.Add(CodeunitID, TableID, TableSettingsName,
            HelpTxt +
            StrSubstNo(FiltersAndRelationsHelpTxt, NVXCountryStatistics.FieldCaption("Country/Region Filter")) +
            StrSubstNo(ResultsHelpTxt, NVXCountryStatistics.FieldCaption("Sales (LCY)"), NVXCountryStatistics.FieldCaption("No. of Pstd. Invoices")));

        TempNCETempDataCodeunit.AddTableFilter(CodeunitID, NVXCountryStatistics.FieldNo("Country/Region Filter"));
        TempNCETempDataCodeunit.AddTableFilter(CodeunitID, Database::"Country/Region", NVXCountryStatistics.FieldNo("Country/Region Filter"), '', CountryRegion.FieldNo(Code));

        Clear(RecField);
        RecField.SetRange(TableNo, TableID);
        RecField.SetFilter("No.", '<%1', 2000000000);
        RecField.SetRange(Enabled, true);
        if RecField.FindSet() then
            repeat
                if (RecField."No." <> NVXCountryStatistics.FieldNo("Country/Region Filter")) then
                    TempNCETempDataCodeunit.AddDataSheetField(CodeunitID, RecField."No.");
            until RecField.Next() = 0;
    end;
}
TempNCETempDataCodeunit.Add is used to integrate the codeunit into the Excel Report Builder. Further information about the purpose and use of the current code unit is also provided here.
TempNCETempDataCodeunit.AddTableFilter is used to specify the filters and possible relations that are to be proposed later when adding to the data sheet.
TempNCETempDataCodeunit.AddDataSheetField is used to specify the fields that are to be proposed later when adding to the data sheet.
Add to Data Sheet
The codeunit can be added to a data sheet via the Add, More Options... action after it has been published. Fields and relations that were specified via AddDataSheetField and AddTableFilter are automatically suggested:
The following result is displayed in Excel after executing the evaluation:
The temporary data code unit can also be subordinated to another table:
The following result is displayed in Excel after executing the evaluation:
Results and behavior of temporary data codeunits
Depending on how the codeunit is programmed, the results also depend on how and where it is later added to a data sheet.
Example 1 only ever determines the total Sales (LCY) of certain countries and returns as a single record.
If the codeunit is called without a filter, it determines the total of Sales (LCY).
If the codeunit is called with filter, it determines the total of Sales (LCY) of all countries within the filter.
If the codeunit is subordinated to the Country/Region table, it determines the value of Sales (LCY) for the country.
However, a different behavior would also be possible, which Example 2 illustrates.
Here for a call without/with filter, the value of Sales (LCY) is determined for each individual country within the filter and several records are returned accordingly.
Example 2
A total is to be calculated for each country within the filter.
It should be possible to specify the country/region code as a filter.
As a result, the total of Sales (LCY) and the number of posted invoices should be returned as a single record for each country/region code.
Implementation
The table for the result is structured as in example 1.
The codeunit for the calculation is structured similarly to example 1. All changes to example 1 are highlighted:
codeunit 50001 "NVX Country Statistics 2"
{
    TableNo = "NVX Country Statistics";

    trigger OnRun()
    var
        NVXCountryStatistics: Record "NVX Country Statistics";
        Customer: Record Customer;
    begin
        if not Rec.IsTemporary() then
            exit;

        //In this example, the total is determined via the customers.
        //Any country/region filters that have been set must therefore be transferred from the temporary table to the customers.
        //The filter on the temporary table is then removed in this example, as the field is only used for filtering the customers.
        Customer.SetCurrentKey("Country/Region Code");
        Rec.FilterGroup(0);
        Customer.FilterGroup(0);
        Rec.CopyFilter("Country/Region Filter", Customer."Country/Region Code");
        Rec.SetRange("Country/Region Filter");
        Rec.FilterGroup(2);
        Customer.FilterGroup(2);
        Rec.CopyFilter("Country/Region Filter", Customer."Country/Region Code");
        Rec.SetRange("Country/Region Filter");
        //set relation filter
        //The Excel Report Builder transfers filters from relations via filter group 11
        Rec.FilterGroup(11);
        Customer.FilterGroup(11);
        Rec.CopyFilter("Country/Region Filter", Customer."Country/Region Code");
        Rec.SetRange("Country/Region Filter");
        Rec.FilterGroup(0);
        Customer.FilterGroup(0);

        NVXCountryStatistics.Copy(Rec);

        Clear(Rec);
        if Customer.FindSet() then
            repeat
                if not Rec.Get(Customer."Country/Region Code") then begin
                    Clear(Rec);
                    Rec."Country/Region Filter" := Customer."Country/Region Code";
                    Rec.Insert();
                end;
                Customer.CalcFields("Sales (LCY)", "No. of Pstd. Invoices");
                Rec."Sales (LCY)" += Customer."Sales (LCY)";
                Rec."No. of Pstd. Invoices" += Customer."No. of Pstd. Invoices";
                Rec.Modify();
            until Customer.Next() = 0;

        Rec.Copy(NVXCountryStatistics);
    end;

    [EventSubscriber(ObjectType::Codeunit, Codeunit::"NCE Temp. Data Codeunit Mgt.", 'OnAddAllowedTempDataCodeunits', '', false, false)]
    local procedure NCETempDataCodeunitMgt_OnAddAllowedTempDataCodeunits(var TempNCETempDataCodeunit: Record "NCE Temp. Data Codeunit" temporary)
    var
        NVXCountryStatistics: Record "NVX Country Statistics";
        CountryRegion: Record "Country/Region";
        RecField: Record Field;
        CodeunitID: Integer;
        TableID: Integer;
        TableSettingsName: Text;
        HelpTxt: Label 'This Codeunit calculates the total for each country within the filter.';
        FiltersAndRelationsHelpTxt: Label '\\Filters and Relations:\The filter in the ''%1'' field determines which Countries/Regions should be included in the evaluation.';
        ResultsHelpTxt: Label '\\Results:\''%1'', ''%2'', ''%3''';
    begin
        CodeunitID := Codeunit::"NVX Country Statistics 2";
        TableID := Database::"NVX Country Statistics";
        TableSettingsName := NVXCountryStatistics.TableCaption();

        TempNCETempDataCodeunit.Add(CodeunitID, TableID, TableSettingsName,
            HelpTxt +
            StrSubstNo(FiltersAndRelationsHelpTxt, NVXCountryStatistics.FieldCaption("Country/Region Filter")) +
            StrSubstNo(ResultsHelpTxt, NVXCountryStatistics.FieldCaption("Country/Region Filter"), NVXCountryStatistics.FieldCaption("Sales (LCY)"), NVXCountryStatistics.FieldCaption("No. of Pstd. Invoices")));

        TempNCETempDataCodeunit.AddTableFilter(CodeunitID, NVXCountryStatistics.FieldNo("Country/Region Filter"));
        TempNCETempDataCodeunit.AddTableFilter(CodeunitID, Database::"Country/Region", NVXCountryStatistics.FieldNo("Country/Region Filter"), '', CountryRegion.FieldNo(Code));

        Clear(RecField);
        RecField.SetRange(TableNo, TableID);
        RecField.SetFilter("No.", '<%1', 2000000000);
        RecField.SetRange(Enabled, true);
        if RecField.FindSet() then
            repeat
                TempNCETempDataCodeunit.AddDataSheetField(CodeunitID, RecField."No.");
            until RecField.Next() = 0;
    end;
}
If the codeunit is added to a data sheet after it has been published, fields and relations are automatically suggested, as in example 1:
The following result is displayed in Excel after executing the evaluation:
Docs / App / Excel Report Builder / Information for Developers Connector
Via the codeunit NCE Connector Excel Evaluations can also be called or integrated from other extensions or from elsewhere.
Currently, 3 functions are available in several variants (or several overloads) for calling an evaluation:
DownloadEvaluation - creates the Excel workbook on your device.
GetEvaluation - works in principle like DownloadEvaluation with the difference that the finished Excel workbook is not downloaded, but returned as a Temp Blob.
In addition, the file name that the Excel Report Builder would assign to the workbook is returned.
ExecuteEvaluation - works in principle like the Execute action.
Note
When calling an evaluation via DownloadEvaluation or GetEvaluation, neither a confirmation page nor a filter page is displayed to the user.
Example 1
On the Customer List page (Page 22), the evaluation 'CUST_ONGOING_DOCS' should be callable via an action. The evaluation should be created and then downloaded.
Implementation
pageextension 50000 "NVX Customer List" extends "Customer List"
{
    actions
    {
        addfirst(Sales)
        {
            action(NVXCallNCEEvaluationAction)
            {
                ApplicationArea = All;
                Caption = 'Excel Evaluation', Comment = 'DEU="Excel-Auswertung"';
                Image = Start;
                Scope = Repeater;
                ToolTip = 'Executes the CUST_ONGOING_DOCS evaluation. This creates an Excel workbook on your device.', Comment = 'DEU="Führt die CUST_ONGOING_DOCS Auswertung aus. Dadurch wird eine Excel-Arbeitsmappe auf Ihrem Gerät erstellt."';

                trigger OnAction()
                var
                    NCEConnector: Codeunit "NCE Connector";
                begin
                    NCEConnector.DownloadEvaluation('CUST_ONGOING_DOCS');
                end;
            }
        }
    }
}
Example 2
The same requirement as in example 1, but in addition it should be ensured that the evaluation contains the "Sales Header" table. All changes to example 1 are highlighted.
Implementation
pageextension 50000 "NVX Customer List" extends "Customer List"
{
    actions
    {
        addfirst(Sales)
        {
            action(NVXCallNCEEvaluationAction)
            {
                ApplicationArea = All;
                Caption = 'Excel Evaluation', Comment = 'DEU="Excel-Auswertung"';
                Image = Start;
                Scope = Repeater;
                ToolTip = 'Executes the CUST_ONGOING_DOCS evaluation. This creates an Excel workbook on your device.', Comment = 'DEU="Führt die CUST_ONGOING_DOCS Auswertung aus. Dadurch wird eine Excel-Arbeitsmappe auf Ihrem Gerät erstellt."';

                trigger OnAction()
                var
                    TempNCEConnectorTableFilter: Record "NCE Connector Table Filter" temporary;
                    NCEConnector: Codeunit "NCE Connector";
                begin
                    Clear(TempNCEConnectorTableFilter);
                    TempNCEConnectorTableFilter."Table No." := Database::"Sales Header";
                    TempNCEConnectorTableFilter.Insert();

                    NCEConnector.DownloadEvaluation('CUST_ONGOING_DOCS', TempNCEConnectorTableFilter);
                end;
            }
        }
    }
}
Example 3
The same requirement as in example 1 and 2, but in addition it is to be filtered on sales quotes, sales orders and on the current customer no. All changes to Example 2 are highlighted.
Implementation
pageextension 50000 "NVX Customer List" extends "Customer List"
{
    actions
    {
        addfirst(Sales)
        {
            action(NVXCallNCEEvaluationAction)
            {
                ApplicationArea = All;
                Caption = 'Excel Evaluation', Comment = 'DEU="Excel-Auswertung"';
                Image = Start;
                Scope = Repeater;
                ToolTip = 'Executes the CUST_ONGOING_DOCS evaluation. This creates an Excel workbook on your device.', Comment = 'DEU="Führt die CUST_ONGOING_DOCS Auswertung aus. Dadurch wird eine Excel-Arbeitsmappe auf Ihrem Gerät erstellt."';

                trigger OnAction()
                var
                    SalesHeader: Record "Sales Header";
                    TempNCEConnectorTableFilter: Record "NCE Connector Table Filter" temporary;
                    NCEConnector: Codeunit "NCE Connector";
                begin
                    Rec.TestField("No.");

                    Clear(TempNCEConnectorTableFilter);
                    TempNCEConnectorTableFilter."Table No." := Database::"Sales Header";
                    TempNCEConnectorTableFilter."Field No." := SalesHeader.FieldNo("Document Type");
                    TempNCEConnectorTableFilter.Filter := StrSubstNo('%1|%2', SalesHeader."Document Type"::Quote, SalesHeader."Document Type"::Order);
                    TempNCEConnectorTableFilter.Insert();

                    Clear(TempNCEConnectorTableFilter);
                    TempNCEConnectorTableFilter."Table No." := Database::"Sales Header";
                    TempNCEConnectorTableFilter."Field No." := SalesHeader.FieldNo("Sell-to Customer No.");
                    TempNCEConnectorTableFilter.Filter := Rec."No.";
                    TempNCEConnectorTableFilter.Insert();

                    NCEConnector.DownloadEvaluation('CUST_ONGOING_DOCS', TempNCEConnectorTableFilter);
                end;
            }
        }
    }
}
Filter
Filters are passed to the NCE Connector via the (temporary) NCE Connector Table Filter table - see Example 3.
When calling the ExecuteEvaluation function, the Filter Type can be set via TempNCEConnectorTableFilter."Filter Type".
For more information, see Edit Evaluations, Data Sheets, Table Settings.
Note
If there are any overlaps with the filters specified in the Excel Evaluation, these will be overwritten.
If filters are passed for a table that occurs more than once in the Excel Evaluation, the filters are set for all tables.
Docs / App / Excel Report Builder / Information for Developers API
Evaluations can also be generated externally using the Excel Report Builder via an API. The created Excel file is returned in Base64 format. For an evaluation to be visible in the API and to be executed via the API, the Allow API Access field must be specified on the Excel Evaluation Card.
For more information, see Edit Evaluations, General, Edit Excel Evaluation.
Note
If necessary, you can also completely disable API access at any time in the Excel Report Builder Setup.
For more information, see Setup, Excel Report Builder Setup.
Endpoint
To access the Excel Report Builder via the API, use the following information:
Publisher
navax
Group
excelReportBuilder
Version
v2.0
Endpoint
excelEvaluations
Evaluation list
A list of all Excel evaluations for which API access is permitted can be retrieved via a GET request.
URL structure
https://api.businesscentral.dynamics.com/v2.0/{tenant}/{environment}/api/navax/excelReportBuilder/v2.0/companies({id})/excelEvaluations
Example
https://api.businesscentral.dynamics.com/v2.0/0e12x34c-e5le-678x-c912-34567890e12l/NAVAXAppsSandbox/api/navax/excelReportBuilder/v2.0/companies(c2d9d41e-19ab-ec11-bb8f-000d3a231900)/excelEvaluations
Result
An Excel evaluation can be created and retrieved via a POST request. The resulting Excel file is returned in Base64 format.
URL structure
https://api.businesscentral.dynamics.com/v2.0/{tenant}/{environment}/api/navax/excelReportBuilder/v2.0/companies({id})/excelEvaluations('{code}')/Microsoft.NAV.GetFileAsBase64
Example
https://api.businesscentral.dynamics.com/v2.0/0e12x34c-e5le-678x-c912-34567890e12l/NAVAXAppsSandbox/api/navax/excelReportBuilder/v2.0/companies(c2d9d41e-19ab-ec11-bb8f-000d3a231900)/excelEvaluations('TEST')/Microsoft.NAV.GetFileAsBase64
Result
The following permission set is available for the API:
NCE, API
Excel Report Builder API
To enable Excel evaluations to be executed via the API, this permission set must be added to the Microsoft Entra Application or, in the case of an on-premises installation, to the API user.
To execute an evaluation or create an Excel workbook, Excel is not required and therefore does not need to be installed.
However, in order for a user to open and view a created Excel workbook, a corresponding program must be installed.
Recommended
Basically, for opening and viewing an Excel workbook Excel 2016 or a newer version is recommended.
It is possible to import old NC Cube files (file name extension .nccx) via the import action. When importing an old NC Cube file, an attempt is made to import or convert as much information as possible from the file.
Please carefully check the correctness of the created evaluation after the import.
Following is no longer supported:
Excel Templates
Charts
Note: PivotCharts are still supported.
Cell Comments
Link/Page Link
The following conversion options are available during import:
Automatic Formatting
Specifies whether the data should be transferred to Excel automatically formatted or whether all data should be transferred as text as before.
The settings can still be changed for each column after the import.
Translate Formulas from
Specifies whether to translate the Excel Function names of the Formulas into English Excel Function names.
Note
The function is available for the following languages: German, Danish, Italian, French, Spanish, Dutch, Finnish, Swedish, Hungarian, Polish and Czech.
For formulas to continue to work, the English Excel Function names, commas instead of semicolons and dots as decimal separators must be used.
The formulas can also be translated individually after the import.
Replace Semicolons in Formulas
Specifies whether to replace semicolons in Formulas with commas and Commas with dots.
Changed behavior for References in connection with Column Inheritance
The new system of column inheritance controls whether the columns of the parent table should be empty or not after a new row starts. In NC Cube, the 1:n JOIN - Fill field was responsible for this. However, in connection with with Formula IDs, there was a problem in NC Cube, which occurred mainly when the 1:n JOIN - Fill field was not activated.
Example
Note: This example is for explanation only and assumes a very simplified database in which only positive Customer Ledger Entries exist.
The following Data Sheet was created:
The following result was displayed in Excel after executing the evaluation:
The percentage value could not be calculated.
As the Formula Auditing shows, the dynamic references or the Formula IDs were converted as follows:
The row no. in the cell reference of the Formula ID [B] was thus also increased.
The new column inheritance creates the following result:
And therefore a correct calculation:
Important
Due to the changed column inheritance, the result of an imported NC Cube evaluation may differ from the result of the old NAV version.
Please check the formulas after the import and change the evaluation if necessary.
To restore the old NC Cube behavior in the example, the Formula =100 / [B] * [A] must be replaced by the formula =100 / [B:COL][ROW] * [A].
Manually convert FlowFilter loops
FlowFilter loops are no longer supported and cannot be automatically converted during import. The file can still be imported, but the settings of the FlowFilter loop(s) will be ignored.
After importing, the FlowFilter loops must be added manually as parent tables.
For more information, see Edit Evaluations, Data Sheets, Data Sheet.
The NAVAX License Management page (in older versions "NAVAX License Overview" or "NCEX License Overview") displays the current license status of the NAVAX extensions.
Fields
Name
Specifies the name of the Extension.
License Status
Specifies the current license status of the Extension.
Serial No.
Specifies the serial number of the Extension.
Version
Specifies the currently installed version of the Extension.
Trial Version
A NAVAX extension can be tested or used free of charge for 30 days after installation. After that, the extension can only be used with a valid license.
Request License
The license can be requested or checked via the Current Status action. This opens a new page.
The following example shows the NAVAX extension Excel Report Builder.
Fill in the fields in the page and then click Send License Request. Please note that the licensing process may take some time. In the next few days you will receive an email with further information.
Note
For licensing, calling the online help and performing some actions, access to https://www.navax.app must be granted.
Public IP from www.navax.app for setting firewall access: 94.136.22.236, Port: TCP/443
Checking the connection to https://www.navax.app using PS: Test-NetConnection navax.app -port 443 (PS must be performed with the M-Tier service user)
CRL Servers In addition, the following CRL Servers must also be accessible for the certificate check: https://certificates.godaddy.com/* http://crl.godaddy.com/* or their IP: 192.124.249.36
Activate/Update License
As soon as the licensing has been completed, you will receive an email and the license can be activated via the Update License action. The license is company independent. So it does not matter in which company the action is called.
Note
The licence must be updated once a year via the Update License action.
The update is only possible or necessary within the last 30 days before the license expires, or afterwards. Within the last 30 days before the license expires, notes are displayed.
If the Automatic License Renewal is enabled, the Update License action is called automatically before the license expires. During this process, all licenses for which automatic license renewal is enabled are checked and updated if necessary. If automatic renewal is not successful, notifications will be displayed within the last 15 days before the license expires. Note that the setting is only active after the license has been activated.
This action can be used to open the Microsoft AppSource ratings page for the extension. We would be very happy if you submit your rating and let us know about your experience with the Extension.
Docs / App / Excel Report Builder / Appendix Comparison with BC Standard and NC Cube
Would you like to know what advantages the Excel Report Builder offers compared to the Business Central Standard?
In the following list you will find a comparison with the Business Central Analysis mode, the Business Central Export to Excel functionality and the Dynamics NAV AddOn NC Cube.
Excel Report Builder
Analysis mode
Export to Excel
NC Cube
Availability
as of BC 14
as of BC 24
all versions
only for NAV
Compatibility
Excel, OpenOffice
Excel
Excel
Excel
Technology
Calculation on the server, Excel does not need to be installed for this
Calculation on the client
Calculation on the client, Excel must be installed on the client for this
Calculation on the client, Excel must be installed on the client for this
Independent of language, region and country settings
Partial
Maximum number of lines
unlimited
100.000 (default) Performance problems with large amounts of data due to browser-based system
50.000 (default) Maximum: 1.000.000
1.048.576
Evaluable tables
All
Only if a page of type List exists for the table.
Only if a page of type List exists for the table.
All
Evaluable fields
All
Only displayed
Only displayed
All
Evaluations can be saved
Limited as page view
Limited as page view
Evaluations can be shared with other users
-
-
Evaluation archive
-
-
Evaluations can be scheduled (incl. Report Inbox)
-
-
-
Cross-company evaluations
-
-
Several worksheets per evaluation
-
-
-
Number of tables per evaluation
unlimited
1
1
Base table required
Table relations
-
-
Add the same field more than once
-
-
Filter at field level Example: Comparison of the current sales amount with the amount from last month
-
-
Formulas, Excel formulas and Excel functions
-
-
Fixed and dynamic references
-
-
Totals calculations
-
-
Column formatting, colors, decimal places, data bars, etc.
-
-
Partial
Pivot functionality
-
Multiple pivot sheets per evaluation
-
-
Multiple pivot charts per evaluation
-
-
Pivot sorting, filters, subtotals
-
-
Pivot data slicer
-
-
Classic pivot layout
Configurable
-
-
Configurable
Flexible date filters (placeholders)
-
-
Parallel tree structures Example: Combining data from different tables
The following Granules are required for an On-Premises installation:
70171825 NAVAX Excel Report Builder
1010860 NAVAX Extension Base
External Addresses
https://www.navax.app
For licensing, calling the online help and performing some actions, access to https://www.navax.app must be granted.
Public IP from www.navax.app for setting firewall access: 94.136.22.236, Port: TCP/443
Checking the connection to https://www.navax.app using PS: Test-NetConnection navax.app -port 443 (PS must be performed with the M-Tier service user)
CRL Servers In addition, the following CRL Servers must also be accessible for the certificate check: https://certificates.godaddy.com/* http://crl.godaddy.com/* or their IP: 192.124.249.36
If the field is related to the Salesperson/Purchaser table, the variable [USERSP] can now be specified in the filter.
For more information, see Edit Evaluations, Data Sheets, Table Settings.
Version 26.3.10.0
as of Business Central 26 2026/06/02
Improvements
If no data is found within the specified filters, a confirmation dialogue will now appear asking whether you wish to create the evaluation anyway.
The fields No. of Email Recipients and Email Body have been added to the Excel Evaluation Card page. Both fields are used as default values for the Send by email action.
For more information, see Edit Evaluations, General, Edit Excel Evaluation.
The permission set record NCE, MY EVALUATIONS could not be used because an indirect permission was missing in the code due to a change.
Version 26.3.6.3
as of Business Central 26 2026/01/19
Corrections
If sheets or columns had the same name regardless of upper or lower case, the Excel workbook was corrupted and the following message appeared when opening the workbook:
We found a problem with some content in '...xlsx'. Do you want us to try to recover as much as we can?
The _xlfn. Prefix was only automatically added to the functions in certain constellations.
Version 26.3.6.2
as of Business Central 26 2025/11/10
Improvements
Any control characters in the data are now automatically replaced by spaces.
Version 26.3.6.1
as of Business Central 26Important Update 2025/10/15
Corrections
The Formula IDs [TOTALVALUE] and [TOTALRECORDS] were not reset correctly in certain constellations and displayed the value of the previous row.
Version 26.3.6.0
as of Business Central 26 2025/09/22
Improvements
The automatic license renewal no longer tries to update the license directly, but instead automatically starts a job queue. During this process, all licenses for which automatic license renewal is enabled are checked and updated if necessary.
For more information, see Appendix, NAVAX License Management.
If Slicers in different PivotTables had the same name, the Excel workbook was corrupted and the following message appeared when opening the workbook:
We found a problem with some content in '...xlsx'. Do you want us to try to recover as much as we can?
Problems could occur when selecting and filtering Enum and Option fields.
Version 26.3.4.0
as of Business Central 26 2025/08/07
Improvements
Support for selecting dimension values (including shortcuts Dimensions 1 to 8) has been expanded and improved.
Corrections
Specifying a Variable in the Filters and Relations area of the Table Settings caused an error when creating the evaluation in certain constellations.
Version 26.3.2.0
as of Business Central 26 2025/07/23
Improvements
Significant improvement in performance when finalizing the workbook.
The table 290 ∙ VAT Amount Line can now be added to the purchase, sales, and service tables. The data is then calculated automatically.
For more information, see Edit Evaluations, Tips & Tricks, VAT Amount Lines.
Quality of Life improvements.
Version 24.3.1.0
as of Business Central 24 2025/04/14
Important
Due to changes in the Granules, the Business Central license needs to be updated for On-Premises installations.
On the Table Settings page, an Output Condition can now be specified for the records of the parent table.
When importing old NC Cube files (file name extension .nccx), the Output only if field is now transferred to the Output Condition field.
For more information, see Edit Evaluations, Data Sheets, Table Settings.
It is now possible to import an Analysis from the analysis mode of a page in order to create an evaluation.
For more information, see Edit Evaluations, General, Import Analysis.
The Previous and Next actions can now be used on the Table Settings, Field Settings, Text Settings and Formula pages. This allows you to switch directly between the settings of the various tables and fields, i.e. the additional step via the data sheet is no longer necessary.
The _xlfn. Prefix field has been added to the Excel Functions Setup page.
Note
The Download action can be used to set or update the field.
Changing the Evaluation Date when executing the evaluation now affects all filter types. So far, filters of the type Restricted, Fixed and Hidden have not been taken into account.
The Evaluation Date field is now also displayed if only hidden date filters are set when the evaluation is executed.
For more information, see Execute Evaluations, Evaluation Filters.
The PivotTable Field Settings were not handled correctly in certain constellations. As a result, the Excel workbook was corrupted and the following message appeared when opening the workbook:
We found a problem with some content in '...xlsx'. Do you want us to try to recover as much as we can?
Version 24.2.5.0
as of Business Central 24 2024/06/26
Improvements
The action Translate all Excel Functions has been added to the Excel Report Builder Setup page.
The action can be used to translate the Excel Function names in the Formulas of all evaluations into English Excel Function names after upgrading the old NC Cube version to Business Central.
For more information, see Setup, Excel Report Builder Setup.
User related filters are no longer deleted when a superordinated table is added.
Corrections
When executing an evaluation with several data sheets, the filters from the different data sheets were not grouped correctly.
For more information, see Execute Evaluations, Evaluation Filters.
Version 21.2.2.0
as of Business Central 21 2024/02/02
Improvements
Fields of type DateTime are now also formatted as DateTime in Excel if automatic formatting is selected for the field. The DateTime Accuracy field can be used to set whether only the minutes or also the seconds should be transferred to Excel.
For more information, see Edit Evaluations, Data Sheets, Field Settings.
The Create Notifications option in the Archive Excel Evaluation action caused an error if multiple users had added the evaluation to the My Excel Evaluations list and the action was scheduled.
For more information, see Execute Evaluations, Archive Excel Evaluation.
The behavior of some pages and changing some field values has been optimized.
Version 21.1.11.0
as of Business Central 21 2023/03/23
Improvements
Since there were several requests regarding the PivotTable option Classical PivotTable Layout, the option has been included in the NCE Excel Builder. The option can be set in the Sheet Settings of the PivotTable. Die Option kann in den Blatteinstellungen der PivotTable gesetzt werden.
For more information, see Edit Evaluations, PivotTable Sheets, PivotTable.
The input area for the formulas has been enlarged. The smaller input area can optionally be activated via the Small Formula Input Area field in the NCE Excel Evaluation Setup.
For more information, see Setup, Excel Report Builder Setup.
When changing a Formula ID in a datasheet, all formulas in which the ID is used as a :COL or :ROW Formula ID are now also changed or updated.
The NCE Excel Evaluation Card page and the NCE Execute Excel Evaluation and NCE Archive Excel Evaluation actions now additionally display the first comment line if there are comments for the evaluation.
Modifications
The Comment field in the Evaluation Archive has been renamed to Archive Comment.
Version 21.1.10.1
as of Business Central 21 2023/02/24
Modifications
The behavior of some pages and changing some field values has been optimized.
1:n relationships did not produce results in certain constellations.
Scheduling an evaluation aborted with the following error message:
"The permission settings of the evaluation do not allow you to execute the evaluation."
The Field Settings page has been revised.
In addition, the Fill Color and the Font Color can now be specified here for each field.
For more information, see Edit Evaluations, Data Sheets, Field Settings.
The Text Settings page has been revised.
In addition, the Fill Color and the Font Color can now be specified here for each field.
For more information, see Edit Evaluations, Data Sheets, Text Settings.
NCE Excel Evaluations can now be very easily integrated or called from other extensions via the NCE Connector codeunit.
For more information, see Information for Developers, Connector.
as of Business Central 21Important Update 2022/11/17
Modifications
The NCE Excel Builder engine has been optimized based on the Excel row no. check added in version NCE 21.1.6.0.
Version 21.1.7.1
as of Business Central 21 2022/11/02
Quality of Life Update
Improvements
On the Formula page in the Datasheet, the Formula Help action has been added.
The action displays an overview of all Excel Functions and Formula IDs used in the current formula.
The caption of the PivotTable Field Settings page now displays the name of the field.
Version 21.1.6.0
as of Business Central 21Important Update 2022/10/24
Important
For On-Premises an update of the License or the following granules is required:
70171825 Excel Report Builder by NAVAX
1010860 Extension Base by NAVAX
Business Central Update
Improvements
In order to ensure that only Codeunits that were also created for the NCE Excel Builder can be executed via the Codeunit to Run setting, they must now be additionally included or unlocked via an EventSubscriber.
For more information, see Information for Developers, Runnable Codeunits.
In the Data Sheet, Temporary Data Codeunits can now be added.
With the help of temporary data codeunits, evaluations can be extended with functions that temporarily calculate certain data of the evaluation during execution.
For more information, see Edit Evaluations, Data Sheets, Table Settings.
A Variable can now be specified for the filter in the Filters and Relations area of the Table Settings.
The variable can then be specified in the filter of other lines to automatically set the same filter there.
For more information, see Edit Evaluations, Data Sheets, Table Settings.
If a connection between Business Central and OneDrive exists, the actions Open in OneDrive and Share are now additionally available for the evaluations.
For more information, see Execute Evaluations, Execute Excel Evaluation.
The input of date filters has been improved.
Data Sheets can now be copied into themselves.
The options of the Add action in the Data Sheet have been optimized for long table names.
When deleting an Excel Evaluation, an additional confirmation dialog is now displayed if archive entries exist for the evaluation.
When executing the evaluation, the record counter now displays the total number of records in addition to the number of top records already passed.
Modifications
PivotTable value fields which are not based on a numeric field are now formatted as Default.
The Excel row no. was not determined correctly in certain constellations or was assigned twice. As a result, the Excel workbook was corrupted and the following message appeared when opening the workbook:
We found a problem with some content in '...xlsx'. Do you want us to try to recover as much as we can?
The error has been fixed and the row no. is now additionally checked when the evaluation is executed.
as of Business Central 20Important Update 2022/07/12
Improvements
When creating a new evaluation, a Data Sheet is now also automatically suggested.
When adding fields to a table, they are now inserted before any child tables.
If the same table is subordinated to the table once again (e.g.: Customer > Customer), this is suggested as a 1:1 relationship with the primary key fields as a filter.
When selecting the "Related fields between table and parent table" option of the Suggest Filter and Relations action in the Table Settings, you can now select for which parent table the related fields should be suggested, if there are several parent tables.
New Formula IDs[TOTALVALUE] - Will be replaced by the sum of the field values of all records in the case of a numeric (Decimal, Integer, BigInteger) field.
[TOTALRECORDS] - Will be replaced by the number of all records.
[RECORDNO] - Will be replaced by a sequential number for the current record.
For more information, see Edit Evaluations, Data Sheets, Formulas.
If no evaluations have been created yet, you will be asked whether the Download Area should be opened when you open the evaluation overview.
The NCE Excel Builder now uses Business Central's Partial Records technology for a further performance boost.
Modifications
The Preview with sample data option is now set to No by default for all calls.
Corrections
For the fields of a field relation (Field 🞥) data from the previous record was displayed for records without a field value.
The action Translate Formula did not work correctly in certain constellations. ROUND became ROAND, for example.
The Translate Formula action now also recognizes function names written in lowercase letters.
Added Codeunit to Run setting to the NCE Excel Evaluation Card page.
Here you can specify a codeunit to run when the evaluation is executed.
For more information, see Edit Evaluations, General, Edit Excel Evaluation.
Adding additional filter fields in the NCE Excel Evaluation Filters page when running an evaluation was not possible under certain constellations.
Version 19.1.1.0
as of Business Central 19 2022/03/28
Improvements
New Formula IDs[PERIOD_TEXT] - Will be replaced by the current period (e.g. 2022/03 March) of a (parent) Date Loop.
[PERIOD_DATE] - Will be replaced by the current period (e.g. 03/01/22..03/31/22) of a (parent) Date Loop.
For more information, see Edit Evaluations, Data Sheets, Formulas.
The Preview in the Download Area is now no longer opened in a separate browser window, but directly in Business Central.
Corrections
When date fields were added to an evaluation, an error message occurred when the evaluation was executed for records with empty date values.
Version 19.1.0.0
as of Business Central 19 2022/03/08
Improvements
The default value is now suggested again in the default style fields of the Excel Evaluation Setup if the value is deleted.
For more information, see Setup, Excel Report Builder Setup.
When changing a Formula ID in a datasheet, all formulas in which the ID is used can now optionally be changed or updated as well.
For more information, see Edit Evaluations, Data Sheets, Formulas.
Improvements & Modifications compared to previous NAV versions
The name of the extension has been changed from NC Cube to NCE Excel Builder.
To execute an evaluation or create an Excel workbook, Excel is no longer required and therefore does not need to be installed.
However, in order for a user to open and view a created Excel workbook, a corresponding program must be installed.
Recommended is Excel 2016 or a newer version.
Alternatively, you can use Excel 2013, Excel 2010, Excel 2007, OpenOffice, Office on an Android device, or Office on an iPhone or iPad.
It is now possible to have several data sources in an evaluation.
Excel Evaluations can now also be scheduled.
When the Excel workbook is ready, a message appears in the Report Inbox from where the Excel workbook can be opened.
The archiving of an Excel Evaluation can now also be scheduled.
When archiving has been performed, a message appears in the Report Inbox.
The archived evaluation can then be opened directly via the Report Inbox or via the NCE Excel Evaluation Archive.
It is now possible to format the data independent of the visualization and therefore also independent of language, region and country settings.
When a user opens the workbook, the data is automatically displayed in the format he or she has set.
Instead of the term Object, the term Sheet is now used.
Instead of the term JOIN, terms like Parent / Child Table and Related with are now used.
Parallel tree structures are now possible.
Tables can be related to each other over several levels.
FlowFilter loops became obsolete with the new relation capabilities.
A field can now be added more than once as a PivotTable value field.
Excel Templates are no longer supported.
Charts are no longer supported.
Cell Comments and Link/Page Link are also no longer supported.
Note
It is possible to import old NC Cube files (file name extension .nccx) via the import action.
For more information, see Appendix, Import old NC Cube files.


 Excel Report Builder consists of two parts:

 For more information, see Setup, Excel Report Builder Setup.
 For more information, see Setup, Excel Functions.
 For more information, see Setup, Evaluation Groups.
 For more information, see Setup, Blocked Tables.
 For more information, see Appendix, NAVAX License Management.
 For more information, see General, Excel Report Builder.


 Via the Add action in the Sheets area Excel sheets can be added to the evaluation.
 The following sheets are available, each with different properties:
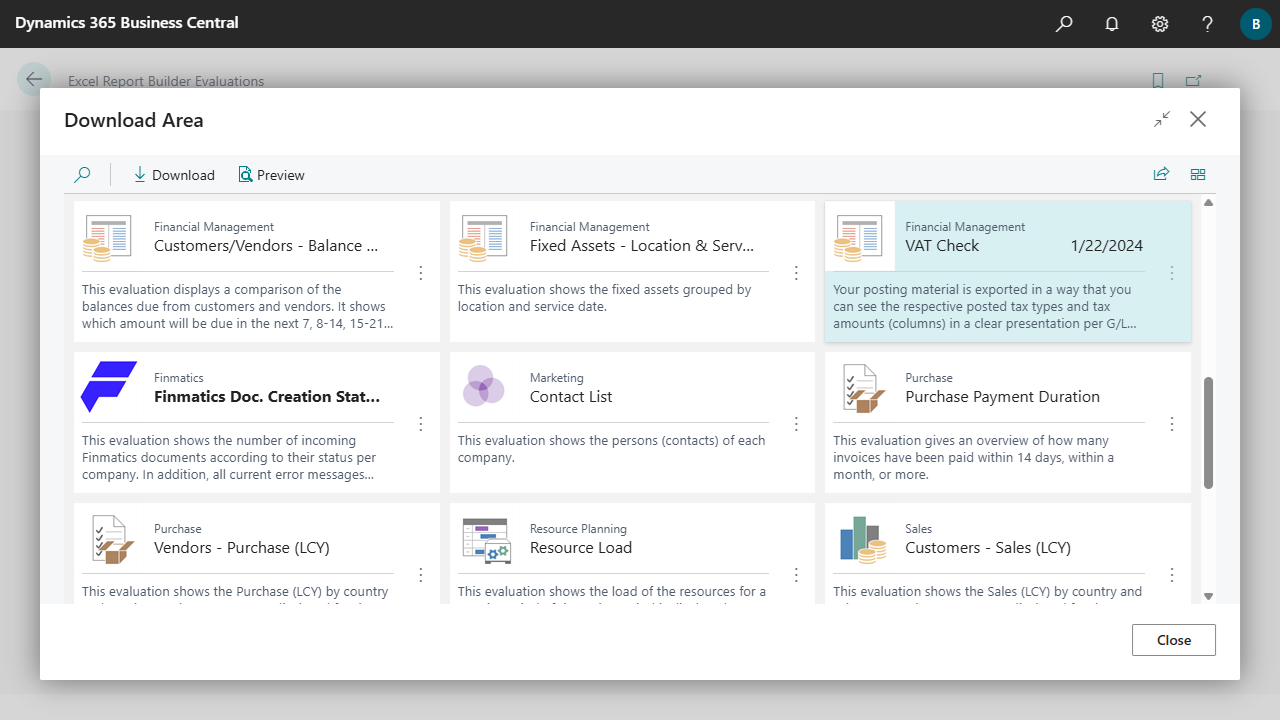 Via the Download action an evaluation can be downloaded and created.


 If the option is selected, an overview with all available tables opens.
 The Search icon at the top of the page can be used to search for a table.
The Field Search action can be used to search for a specific field, similar to the table search. Both searches can also be combined.
The selected table can be added to the Data Sheet with Ok and then displayed or set up via the Edit action or by clicking on the Settings field.
For more information, see Edit Evaluations, Data Sheets, Table Settings.
The Search icon at the top of the page can be used to search for a table.
The Field Search action can be used to search for a specific field, similar to the table search. Both searches can also be combined.
The selected table can be added to the Data Sheet with Ok and then displayed or set up via the Edit action or by clicking on the Settings field.
For more information, see Edit Evaluations, Data Sheets, Table Settings. If the option is selected, an overview of all available fields of the table opens.
 The Search icon at the top of the page can be used to search for a field.
In addition, various actions are available for filtering the fields.
The Search icon at the top of the page can be used to search for a field.
In addition, various actions are available for filtering the fields.
 The following symbols are displayed or used in the line information:
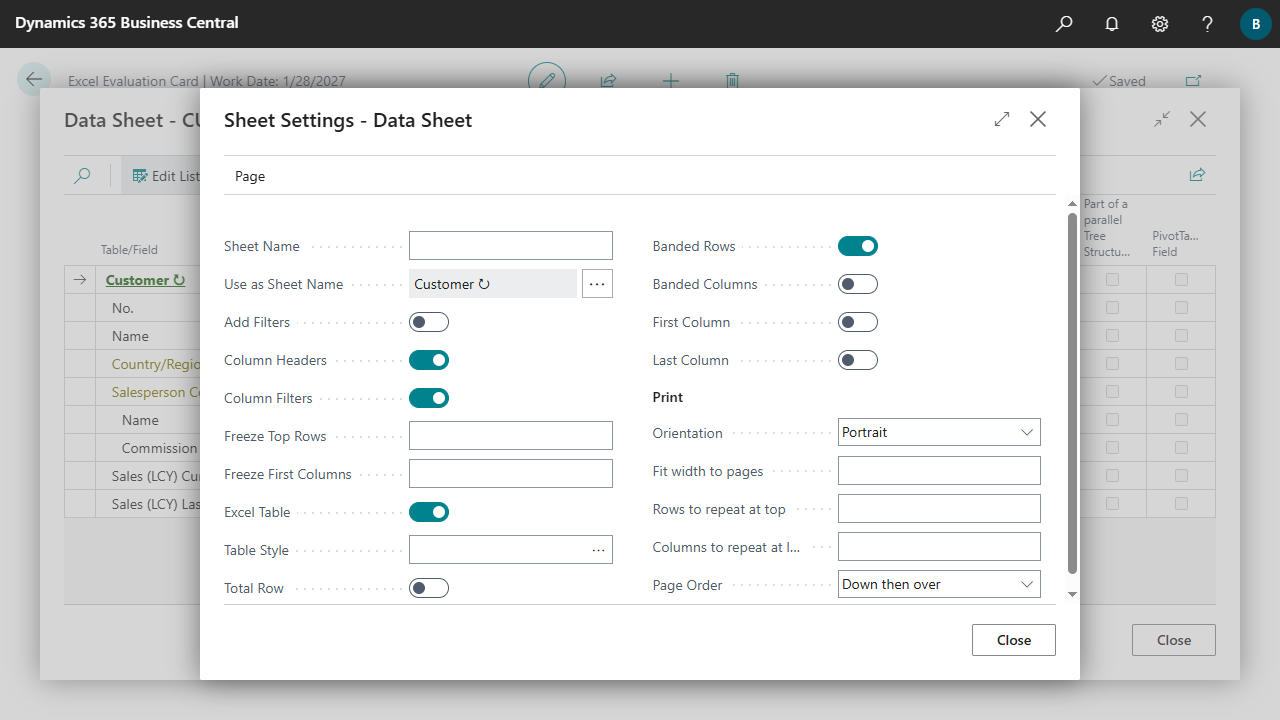

 The following result is displayed in Excel after executing the evaluation:

 The trick is to subordinate the Customer table to the Customer table in a 1:1 relationship. After that, the Sales Header table can be output parallel to the subordinate customer. Both subordinated tables are linked to the superordinated customer table.
The indentation is created with an empty formula field (Spacer).
The following result is displayed in Excel after executing the evaluation:
The trick is to subordinate the Customer table to the Customer table in a 1:1 relationship. After that, the Sales Header table can be output parallel to the subordinate customer. Both subordinated tables are linked to the superordinated customer table.
The indentation is created with an empty formula field (Spacer).
The following result is displayed in Excel after executing the evaluation:


 Example Customer 1:n Customer Ledger Entries without Column Inheritance

 Example Customer 1:n Customer Ledger Entries with new row

 In case of a Relation the field value of the parent record is used as filter criterion. A operator in the filter determines how the filter should be set.
The Suggest Filters action can be used to suggest fields of the table and related fields between the table and the parent table. Existing filters will not be overwritten or changed.
In case of a Relation the field value of the parent record is used as filter criterion. A operator in the filter determines how the filter should be set.
The Suggest Filters action can be used to suggest fields of the table and related fields between the table and the parent table. Existing filters will not be overwritten or changed.


 To set up the evaluation:


 For more information about formulas and functions, see:
https://support.microsoft.com/en-us/office/294d9486-b332-48ed-b489-abe7d0f9eda9
For more information about formulas and functions, see:
https://support.microsoft.com/en-us/office/294d9486-b332-48ed-b489-abe7d0f9eda9 For each Customer Ledger Entry, the percentage of Balance (LCY) of the customer is calculated first.
For this purpose, the Balance (LCY) field was assigned the variable [B] and the Amount (LCY) field was assigned the variable [A].
The percentage value can thus be calculated in a Formula Field using the Formula =100/[B]*[A].
In addition, all entries are marked that are above a certain percentage value.
For this, the Percent Formula Field was assigned the variable [P].
In this example, the limit value is implemented via a text line before the data table.
The default value for the limit value is 50 percent. The variable [LP] was assigned to the Limit field.
The following result is displayed in Excel after executing the evaluation:
For each Customer Ledger Entry, the percentage of Balance (LCY) of the customer is calculated first.
For this purpose, the Balance (LCY) field was assigned the variable [B] and the Amount (LCY) field was assigned the variable [A].
The percentage value can thus be calculated in a Formula Field using the Formula =100/[B]*[A].
In addition, all entries are marked that are above a certain percentage value.
For this, the Percent Formula Field was assigned the variable [P].
In this example, the limit value is implemented via a text line before the data table.
The default value for the limit value is 50 percent. The variable [LP] was assigned to the Limit field.
The following result is displayed in Excel after executing the evaluation:

 [B] was replaced by the cell reference of the Balance (LCY) field.
[A] was replaced by the respective cell reference of the Amount (LCY) field.
[P] was replaced by the respective cell reference of the Percent formula field.
[LP] was replaced by the cell reference of the Limit field.
[B] was replaced by the cell reference of the Balance (LCY) field.
[A] was replaced by the respective cell reference of the Amount (LCY) field.
[P] was replaced by the respective cell reference of the Percent formula field.
[LP] was replaced by the cell reference of the Limit field.
 The changes have been marked in the image.
In version 1, the Customer No. field is added to the entries.
Using the formula =COUNTIF([PNO:COL]:[PNO:COL],[NO]) all rows are counted where the column with the variable [PNO] contains the value of the variable [NO] and thus the No. of the customer.
The changes have been marked in the image.
In version 1, the Customer No. field is added to the entries.
Using the formula =COUNTIF([PNO:COL]:[PNO:COL],[NO]) all rows are counted where the column with the variable [PNO] contains the value of the variable [NO] and thus the No. of the customer.
 The changes have been marked in the image.
In this version a Formula Field Customer RowID is added to the entries.
The field is filled via a Formula with the row no. of the Number of Entries field and thus with the row no. of the customer record. Thus, each entry has a unique criterion for the query.
Using the formula =COUNTIF([RID:COL]:[RID:COL],[ROW]) all rows are counted where the column with the variable [RID] contains the value of the row no. of the customer record.
The changes have been marked in the image.
In this version a Formula Field Customer RowID is added to the entries.
The field is filled via a Formula with the row no. of the Number of Entries field and thus with the row no. of the customer record. Thus, each entry has a unique criterion for the query.
Using the formula =COUNTIF([RID:COL]:[RID:COL],[ROW]) all rows are counted where the column with the variable [RID] contains the value of the row no. of the customer record.


 The grand total for columns is displayed at the bottom of the PivotTable:


 Basically, users can add an evaluation to their My Excel Evaluations list by themselves if they are allowed to execute the evaluation.
However, it is also possible to add an evaluation to the My Excel Evaluations list of certain users via the No. of Subscribers field.
Basically, users can add an evaluation to their My Excel Evaluations list by themselves if they are allowed to execute the evaluation.
However, it is also possible to add an evaluation to the My Excel Evaluations list of certain users via the No. of Subscribers field.


 If you use the month field in a PivotTable as a column label, the sorting depends on the sorting of the records in the data sheet by default. This may produce the following result:
 This can be prevented by specifying the sorting for the column name:
 This produces the following result:
 The example can be downloaded in the Download Area.
 The text formatting causes only the first two digits of the IBAN to be displayed.
In addition, the field has been assigned the Variable [CC]. Optionally, a descriptive name can also be assigned.
After that, another data sheet with the Country/Region table must be added to the evaluation.
The text formatting causes only the first two digits of the IBAN to be displayed.
In addition, the field has been assigned the Variable [CC]. Optionally, a descriptive name can also be assigned.
After that, another data sheet with the Country/Region table must be added to the evaluation.
 This data sheet contains all country codes and their names. CCNames was given as the Sheet Name.
 The country name for the IBAN can now be determined in the Customer Bank Account data sheet using a formula:
 The example can be downloaded in the Download Area.
 In the Accountant role and in the Accounting Manager role, the list is also integrated as a Role Center list.
For more information, see General, Role Center Integration.
Evaluations can be added to the list via the Add action.
In the Accountant role and in the Accounting Manager role, the list is also integrated as a Role Center list.
For more information, see General, Role Center Integration.
Evaluations can be added to the list via the Add action.
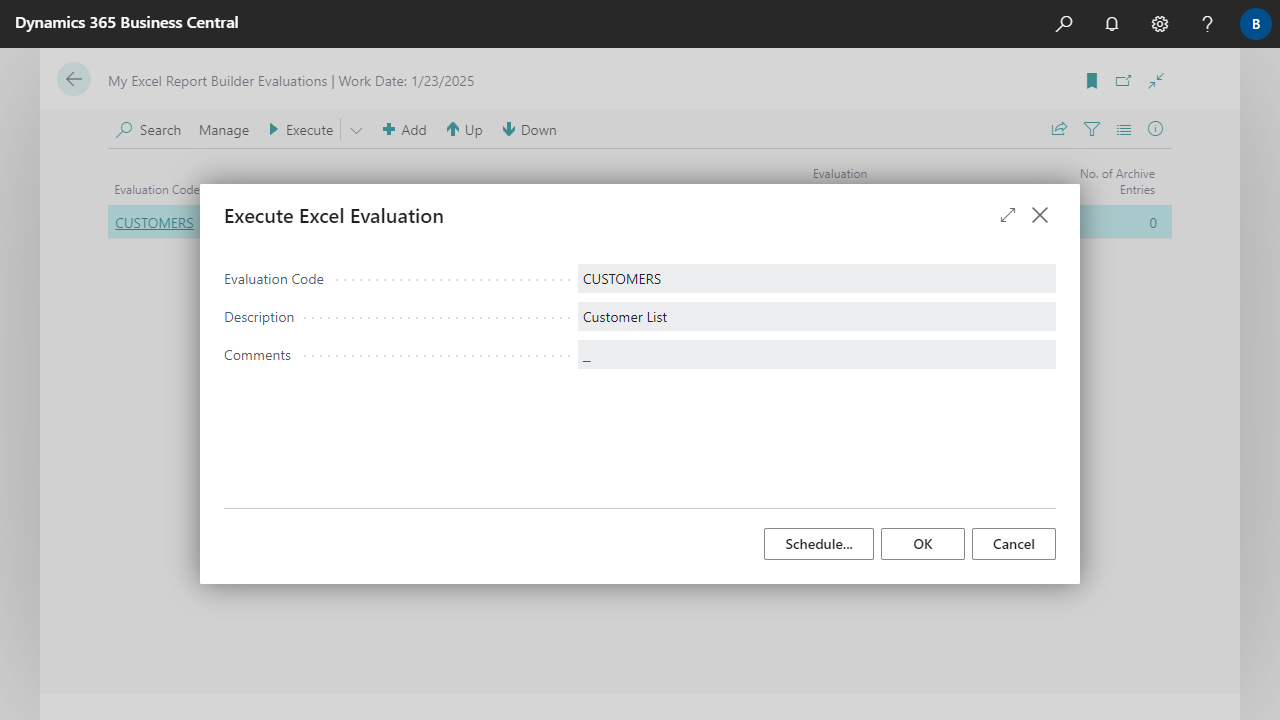


 To complete the process, click on Send email.
 For more information, see Execute Evaluations, Archive Excel Evaluation.
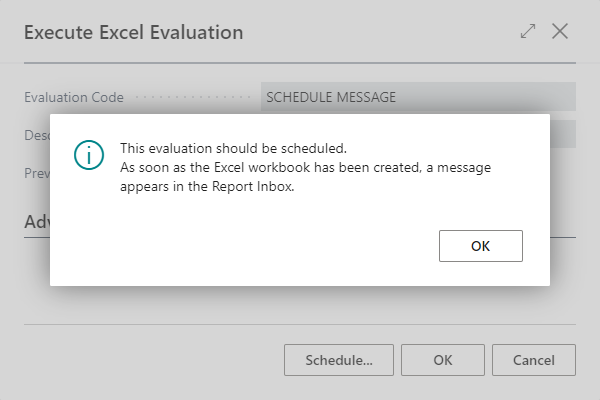
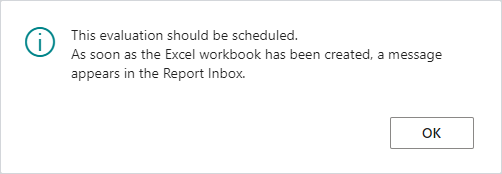
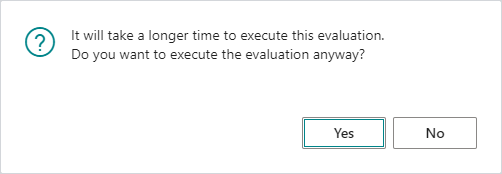

 The following result is displayed in Excel after executing the evaluation:
 The temporary data code unit can also be subordinated to another table:
 The following result is displayed in Excel after executing the evaluation:

 The following result is displayed in Excel after executing the evaluation:

 The following result was displayed in Excel after executing the evaluation:
 The percentage value could not be calculated.
As the Formula Auditing shows, the dynamic references or the Formula IDs were converted as follows:
The percentage value could not be calculated.
As the Formula Auditing shows, the dynamic references or the Formula IDs were converted as follows:
 The row no. in the cell reference of the Formula ID [B] was thus also increased.
The new column inheritance creates the following result:
The row no. in the cell reference of the Formula ID [B] was thus also increased.
The new column inheritance creates the following result:
 And therefore a correct calculation:


 Fill in the fields in the page and then click Send License Request. Please note that the licensing process may take some time. In the next few days you will receive an email with further information.


